We use affiliate links to run our site. When you buy through links on our site, we may earn an affiliate commission, without any added cost to you. Learn more
Want to do gardening but not having enough space in the backyard? Why not think upwards? If you have a rooftop you can definitely use it to grow your favorite plants.
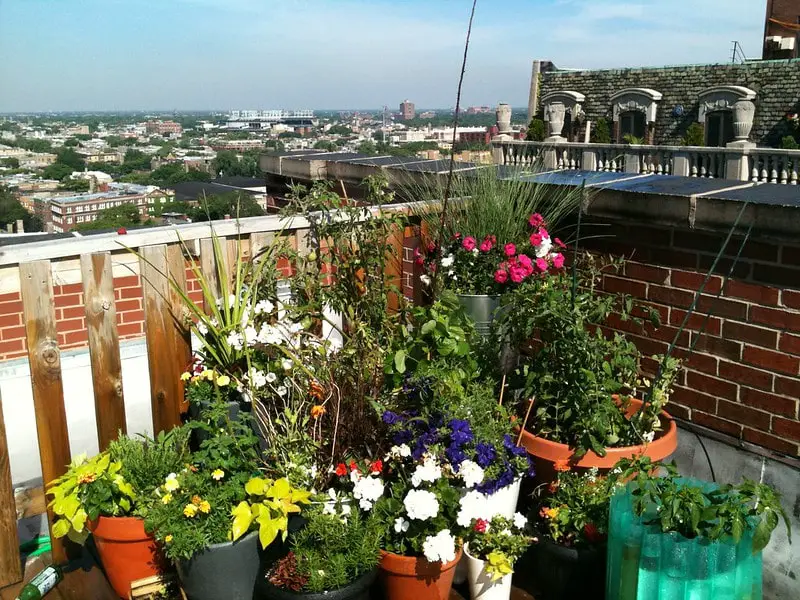
The best way to start a garden in an apartment or condo is to use your balcony, rooftop, terrace to grow plants. The possibility is endless. You can grow almost anything from veggies, flowers, or herbs.
What is A Rooftop Garden:
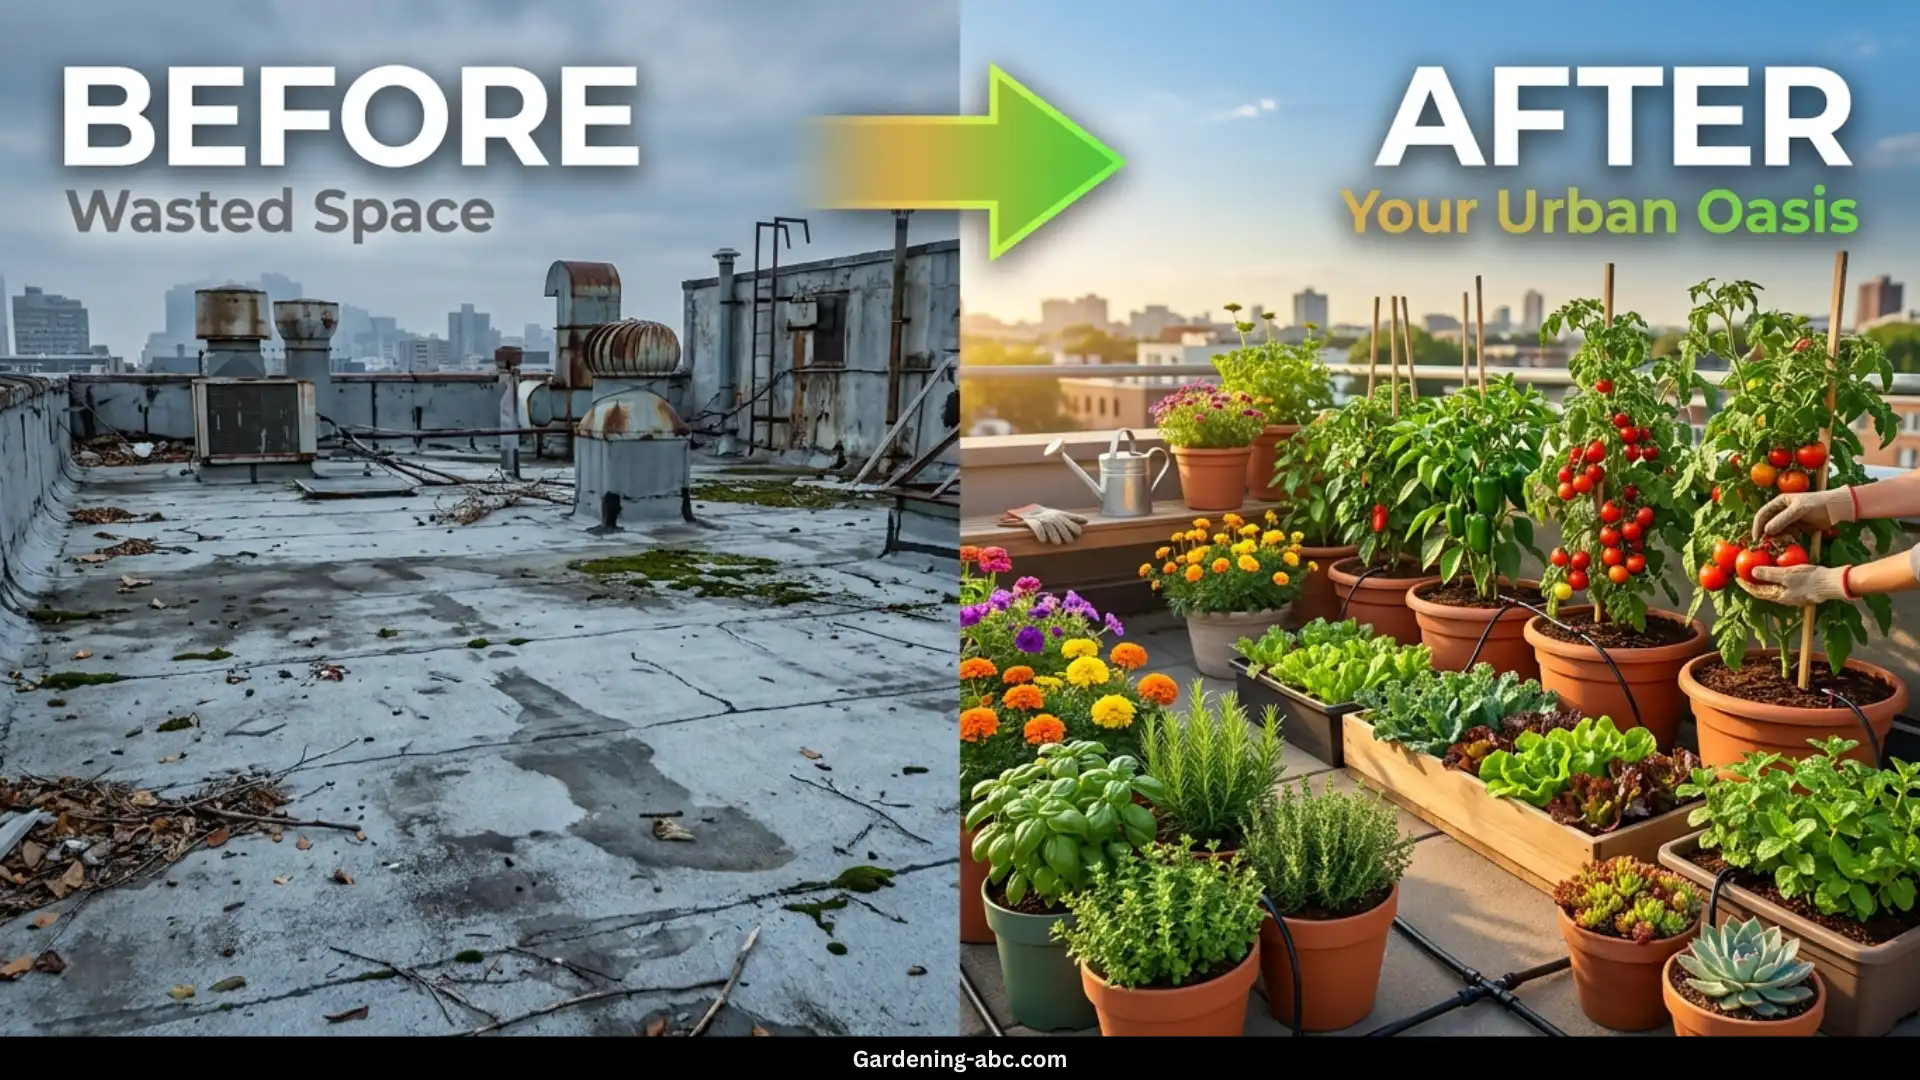
At its core, rooftop gardening is exactly what it sounds like: growing plants, vegetables, herbs, or even small trees on the roof of a building. But don’t let that simple definition fool you. Rooftop gardens can range from a few potted herbs on a terrace to full-blown agricultural installations producing hundreds of pounds of food annually.
Think of your rooftop as unused real estate. Just like developers convert abandoned lots into parks or restaurants, you can convert dead space into a living, breathing ecosystem. It’s urban farming meets interior design, and it’s catching on fast.
Why Rooftop Gardening Is Taking Over Cities
Ground-level gardening in cities is a luxury most people don’t have. Tiny backyards, zero outdoor space, and concrete everywhere have pushed creative gardeners to look up. Rooftops offer something genuinely rare in urban environments — open sky, unobstructed sunlight, and space that isn’t competing with anything else.
Cities like New York, London, Singapore, and Tokyo have embraced rooftop agriculture at scale. Restaurants grow ingredients on their own roofs. Community gardens thrive six stories above street level. And ordinary apartment dwellers are quietly harvesting vegetables nobody even knows about.
The Real Benefits of Rooftop Gardening
Before we get into the how, let’s talk about the why — because the benefits go far deeper than just having fresh basil on hand.
Environmental Benefits
- Urban heat island reduction: Plants absorb heat that concrete radiates, cooling your building and the surrounding area.
- Improved air quality: Vegetation filters pollutants and produces oxygen in environments that desperately need it.
- Stormwater management: Soil and plants absorb rainfall, reducing runoff and relieving pressure on city drainage systems.
- Biodiversity support: Flowers attract bees, butterflies, and other pollinators that struggle to survive in concrete-heavy cities.
- Carbon footprint reduction: Growing your own food cuts the supply chain — no trucks, no packaging, no miles.
Personal & Lifestyle Benefits
- Fresh, chemical-free produce at arm’s reach
- A genuine stress-relief outlet — gardening is scientifically linked to reduced cortisol levels
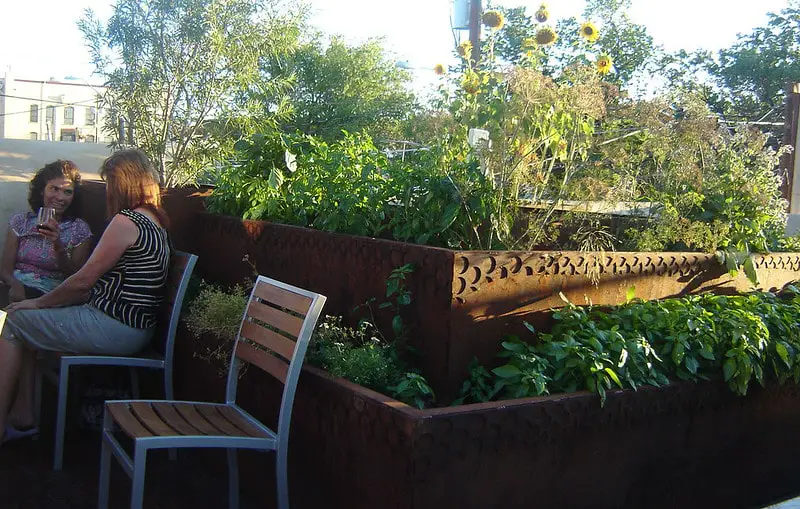
- A social space that transforms a dead roof into a community hub
- Increased property appeal — green spaces consistently boost perceived property value
A creative hobby that rewards patience with tangible, edible results.
Two Types of Rooftop Gardens: Which Suits You?
Not every rooftop garden looks the same. Your first big decision is choosing which approach fits your budget, skill level, and goals.
1. Fully Planted Green Rooftops
Picture this: your entire roof blanketed in soil, with plants growing directly from it like a traditional garden. It looks incredible. It’s an environmental powerhouse. And for most beginners, it’s completely the wrong choice.
Why? Because it requires structural engineers, professional waterproofing systems, drainage architecture, and a budget that can run into tens of thousands of dollars. It’s the equivalent of deciding your first cooking project will be a five-course Michelin-starred meal. Admirable ambition, terrible starting point.
Best for: Property developers, commercial buildings, or homeowners with professional support and serious budgets.
2. Container & Raised Bed Gardens
This is where you should start — full stop. Container and raised bed gardening gives you all the joy of rooftop growing with a fraction of the complexity. You control everything: the soil, the layout, the scale. You can start with five pots and expand to fifty. You can rearrange, experiment, and adapt without calling an architect.
Best for: Beginners, renters, apartment dwellers, and anyone who wants results without a construction project.
Everything from this point forward is built around this approach.
How to Build Your Rooftop Garden: Step-by-Step
Step 1 — Waterproofing: The Foundation You Cannot Skip
If there is one thing you take from this entire guide, let it be this: do not skip waterproofing. Water damage to a building is catastrophic — expensive, structural, and deeply unpleasant for everyone living below your garden.
Your main waterproofing options:
- EPDM Rubber Membranes — durable, flexible, widely used. Cost: $5–15/sq ft
- PVC or TPO Membranes — excellent for flat roofs, heat-welded seams. Cost: $6–12/sq ft
- Liquid Polyurethane Coatings — great for irregular surfaces. Cost: $3–8/sq ft
- Bituminous Membranes — traditional, reliable, cost-effective. Cost: $4–10/sq ft
Renting? Get written landlord permission first. Use heavy-duty waterproof trays under all containers as a minimum precaution.
Step 2 — Protection & Thermal Insulation Layers
Think of this as putting a jacket over your waterproofing. The protection layer shields the membrane from physical damage — roots, sharp edges, foot traffic. On top of that goes a thermal insulation layer, typically 1–2 inches of rigid foam board (XPS or polyisocyanurate).
Why does this matter? On a hot summer day, a bare roof surface can reach 150°F or higher. Without insulation, that heat transfers directly into your soil, stressing roots and accelerating moisture loss. The thermal layer acts as a buffer — keeping your soil at a stable, plant-friendly temperature.
Step 3 — Drainage: Keeping Roots Healthy
Waterlogged soil is a death sentence for most plants. Your drainage layer sits between the insulation and the soil, allowing excess water to flow away freely.
| Drainage Material | Cost Level | Best Application |
| Gravel or pebbles | $ | Simple, widely available |
| Broken clay tiles | $ | Budget-friendly, effective |
| Pumice stone | $$ | Lightweight, excellent drainage |
| Porous drainage mats | $$ | Even distribution, low profile |
| Recycled plastic boards | $$ | Eco-friendly, durable |
Install 2–4 inches of drainage material, then lay a geotextile filter fabric on top to stop soil particles from washing through.
Step 4 — Choosing the Right Soil Mix
Here’s where beginners make their most common mistake: using regular garden soil on a rooftop. Don’t. Garden soil compacts, gets waterlogged, and becomes a heavy, root-strangling mess in containers.
Instead, build this mix:
- 40% high-quality potting compost
- 30% mature compost or worm castings
- 20% perlite or vermiculite (for drainage and aeration)
- 10% coir or aged bark (for moisture retention)
Soil depth by plant type:
| Plant Type | Minimum Depth |
| Herbs & salad leaves | 8–10 inches |
| Tomatoes, peppers, beans | 12–18 inches |
| Root vegetables | 18–24 inches |
| Dwarf shrubs & fruit trees | 24–36 inches |

The design is flexible here you can create any style without needing any professional help. Growing plants in containers are perfect for most of the people who want to do rooftop gardening.
What to Grow: Best Plants for Rooftop Gardens
Vegetables That Love Rooftop Life
Rooftops are sun-rich environments — which is exactly what most vegetables need. If your roof gets 6+ hours of direct sunlight daily, you can grow an impressive range of crops.
Top performers:
- Cherry tomatoes (compact, prolific, container-perfect)
- Sweet and hot peppers
- Courgette / zucchini
- Bush beans (avoid climbing varieties)
- Lettuce and salad leaves
- Radishes (fastest crop you’ll ever grow)
- Compact cucumbers
- Spring onions and chives
Start here: Tomatoes and peppers. They’re forgiving, productive, and deeply satisfying to harvest.
Herbs: The Beginner’s Best Friend
Honestly, if you’re nervous about rooftop gardening, herbs are your confidence builders. They’re practically indestructible, grow fast, and reward you almost immediately.
The rooftop herb hall of fame:
- Basil — loves heat, grows explosively in summer
- Rosemary — drought-tolerant, almost immortal
- Thyme — thrives on neglect
- Oregano — spreads enthusiastically
- Mint — (keep this contained in its own pot — it will take over everything)
- Sage — handles wind and heat like a champion
- Parsley — reliable, biennial, unfussy
- Chives — perennial, comes back every year without asking
Flowers, Succulents & Ornamentals
A rooftop garden doesn’t have to be purely functional. Flowers bring pollinators, repel pests, and make the space genuinely beautiful.
Best rooftop flowers:
- Marigolds (pest-repelling powerhouses)
- Zinnias (long-blooming, heat-tolerant)
- Nasturtiums (edible AND beautiful)
- Sunflowers (dramatic, bee-attracting)
- Petunias (low maintenance, high colour)
Succulents for low-effort beauty:
- Sedum (groundcover champion)
- Echeveria (architectural, drought-proof)
- Aloe vera (useful AND ornamental)
- Sempervivum (survives almost anything)
Fruits and Dwarf Trees: Yes, Really
Growing fruit on a rooftop sounds ambitious, but it’s more achievable than you’d think — as long as you choose dwarf varieties and give them proper containers.
Container-friendly fruits:
- Dwarf apple and pear trees (20–30 gallon containers)
- Blueberries (need acidic soil, but thrive in pots)
- Strawberries (hanging baskets work brilliantly)
- Dwarf citrus — lemon, lime, calamondin
- Dwarf peach or nectarine
The key rule: match container size to root depth needs. A cramped root system means a stressed, unproductive plant.
Critical Factors Every Beginner Must Assess
Weight Load: Know Your Roof’s Limits
This is the most important practical consideration — and the one most beginners ignore until it’s too late.
Most residential roofs handle 20–50 lbs per square foot. That sounds like a lot until you realize wet soil weighs over 100 lbs per cubic foot. Add containers, mature plants, irrigation water, and the weight of people walking around, and you can hit structural limits faster than you’d expect.
Before you start:
- Consult a structural engineer or your building’s technical plans
- Calculate total load: soil + containers + plants + water + foot traffic
- Reduce weight where possible — use plastic containers over ceramic, mix perlite into soil
Sunlight & Heat: Friend and Foe
Rooftops are sun magnets. For most vegetables, that’s perfect. But in peak summer, reflected heat from concrete surfaces can push soil temperatures above 120°F — enough to cook roots and evaporate moisture within hours.
Manage it by:
- Using shade cloth (30–50%) during the hottest months
- Mulching heavily (2–3 inches) to regulate soil temperature
- Choosing heat-tolerant varieties where possible
- Watering in the early morning to reduce evaporation
Wind: The Silent Plant Killer
You won’t realize how windy your roof is until your tomato plant is horizontal. Elevated spaces funnel and amplify wind in ways that ground-level gardens never experience.
Solutions:
- Install windbreak fencing, screens, or trellis panels
- Cluster containers together for mutual support
- Stake all tall plants without exception
- Choose stocky, wind-resistant varieties where possible
Water Access & Drainage Planning:
Ask yourself honestly: is there a water source on your roof, or are you hauling watering cans up three flights of stairs every morning? Because that gets old — fast.
Your irrigation options:
| Method | Cost | Effort Level | Best For |
| Manual hose | $ | High | Small gardens, casual growers |
| Drip irrigation system | $$ | Low | Medium to large gardens |
| Soaker hoses | $ | Medium | Raised beds, rows |
| Rainwater harvesting | $$ | Low (once set up) | Eco-conscious growers |
| Self-watering containers | $$ | Very Low | Beginners, busy lifestyles |
The golden rule: install a dedicated water outlet on your roof before you plant a single thing. Retrofitting water access after the fact is expensive and disruptive. Do it once, do it right.
For drainage:
- Never let water pool around container bases — it breeds root rot and mosquitoes
- Ensure your roof’s existing drainage channels stay clear and unobstructed
- Elevate containers slightly on feet or risers to allow free water flow underneath
- Check drainage after every heavy rainfall, especially in the first season
Accessibility: Be Honest With Yourself
Here’s a question most gardening guides never ask: how realistically accessible is your rooftop?
Because here’s what happens. You’re excited in April. You haul bags of soil up a steep ladder, squeeze through a narrow hatch, and tell yourself you’ll do it every day. Then July arrives. It’s 90°F. The hatch is awkward. The stairs are steep. And suddenly your thriving garden becomes a wilting, neglected disappointment — not because you’re a bad gardener, but because the friction was too high.
Before committing, honestly assess:
- Is access via proper stairs or a precarious ladder?
- Can you carry 40 lb bags of soil up comfortably?
- Is there electricity available for grow lights or fans?
- Are there safety rails or barriers around the perimeter?
- Is the roof surface non-slip when wet?
If the access is genuinely difficult, start with the absolute minimum — five small containers, lightweight soil mix, and low-maintenance plants. Build the habit before you build the garden.
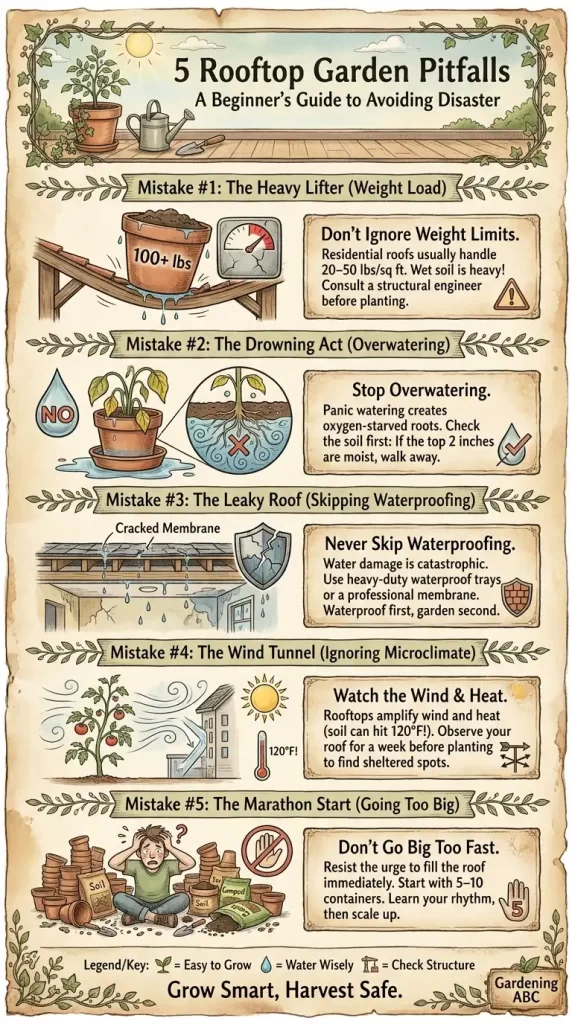
5 Rookie Mistakes That Destroy Rooftop Gardens
These aren’t hypothetical. These are the exact errors that turn enthusiastic beginners into defeated ex-gardeners. Learn them. Avoid them.
Mistake #1: Overwatering
It seems counterintuitive, but overwatering kills more rooftop plants than drought does. Containers dry out faster than ground soil, so beginners panic and water constantly — creating waterlogged, oxygen-starved roots. The fix is simple: push your finger 2 inches into the soil. If it’s still moist, walk away. Water only when the top layer is genuinely dry.
Mistake #2: Skipping Waterproofing
We’ve said it before and we’ll say it again, because the consequences of getting this wrong are severe. One compromised membrane means water damage to ceilings, walls, and structural elements below. The repair bill will dwarf anything you spent on the garden. Waterproof first. Garden second. No exceptions.
Mistake #3: Going Too Big Too Fast
You’ve read this guide, you’re inspired, and now you want 40 containers, a drip system, three fruit trees, and a herb wall by next weekend. Resist that urge completely. Start with 5–10 containers. Learn which plants thrive in your specific microclimate. Understand your watering rhythm. Then scale up with confidence rather than chaos.
Mistake #4: Using the Wrong Container Size
Container size is not a minor detail — it’s the difference between a thriving plant and a stunted one. Too small, and roots get pot-bound, dry out rapidly, and produce poorly. Too large, and soil stays wet far too long, inviting root rot.
Quick reference:
- Herbs: 5–6 inch pots minimum
- Lettuce and salad greens: 8–10 inch pots
- Peppers: 10–12 inch containers
- Tomatoes: 15–20 gallon containers
- Dwarf fruit trees: 20–30 gallon containers
Mistake #5: Ignoring Your Specific Microclimate
Your rooftop isn’t generic — it has its own unique microclimate shaped by surrounding buildings, orientation, prevailing wind direction, and seasonal sun angles. What works brilliantly on a south-facing London rooftop may fail completely on a north-facing one two streets away.
The fix: Spend one full week observing your roof before buying a single plant. Track where the sun hits at 8am, 12pm, and 4pm. Note where wind comes from and how strong it gets. Identify any shaded corners. That week of observation will save you months of failed experiments.
Rooftop Garden Maintenance: A Seasonal Breakdown
A rooftop garden isn’t a “set it and forget it” project — but it doesn’t have to consume your life either. Think of maintenance like brushing your teeth: small, consistent actions that prevent big problems.
Daily (5–10 minutes):
- Check soil moisture in containers
- Remove any dead or yellowing leaves
- Scan for early signs of pests or disease
Weekly (20–30 minutes):
- Water deeply if soil is dry
- Deadhead spent flowers to encourage new blooms
- Check stakes and supports are secure
- Inspect for aphids, spider mites, or fungal issues
Monthly (1–2 hours):
- Feed plants with a balanced liquid fertilizer
- Prune for shape and airflow
- Inspect waterproofing and drainage channels
- Adjust shade cloth or windbreaks as needed
Seasonally:
| Season | Key Tasks |
| Spring | Refresh soil, sow warm-season seeds, clean containers |
| Summer | Daily watering, pest vigilance, shade management |
| Autumn | Plant cool-season crops, harvest and preserve |
| Winter | Protect sensitive plants, repair structures, plan ahead |
Budget Reality Check: What Does It Actually Cost?
Let’s talk numbers honestly, because too many gardening guides gloss over this entirely.
| Item | Budget Option | Mid-Range | Premium |
| Waterproofing (per 100 sq ft) | $300–500 (DIY liquid coat) | $800–1,200 | $1,500–3,000+ |
| Containers (x10) | $30–60 (recycled/plastic) | $100–200 | $250–500+ |
| Soil & growing medium | $60–100 | $150–200 | $250–350 |
| Seeds & plants | $20–40 | $60–100 | $150–300 |
| Irrigation setup | $0 (manual) | $80–150 | $250–500 |
| Tools & accessories | $30–50 | $80–120 | $200–400 |
| Total startup estimate | $440–750 | $1,270–1,970 | $2,600–5,050+ |
Money-saving strategies that actually work:
- Start with seeds rather than established seedlings — the cost difference is dramatic
- Use food-grade plastic buckets as containers (free or near-free from restaurants)
- Make your own compost from kitchen scraps
- Join a local gardening group to swap seeds and cuttings
- Buy soil in bulk rather than individual bags
- Repurpose old wooden pallets as raised bed frames
Container vs. Raised Bed: Quick Comparison
Still undecided on your setup? This table cuts through the noise:
| Factor | Containers | Raised Beds |
| Setup cost | Low | Medium–High |
| Flexibility | Very high — moveable | Fixed once built |
| Weight | Lower | Higher |
| Soil volume | Limited | Greater |
| Plant variety | Herbs, veg, flowers | All types including shrubs |
| Maintenance | More frequent watering | Less frequent watering |
| Best for | Beginners, renters | Committed gardeners, owners |
| Scalability | Easy to add more | Requires planning |
The honest verdict: start with containers, graduate to raised beds once you’ve proven your commitment and understood your roof’s specific conditions.
Conclusion: Stop Staring at That Empty Roof
You’ve made it to the end of this guide, which means one thing: you’re serious about this. And you should be, because a rooftop garden is one of the most rewarding projects an urban dweller can undertake.
It’s not just about growing food — though harvesting your own tomatoes at 7am in your pyjamas is genuinely one of life’s simple pleasures. It’s about reclaiming space that the city took from you. It’s about creating something living and breathing in an environment dominated by concrete and glass. It’s about proving, one container at a time, that nature finds a way — especially when you give it a little help.
The path is clear. Start small. Waterproof properly. Choose the right plants for your conditions. Observe before you plant. Maintain consistently. And above all, don’t let perfect be the enemy of good. A single pot of basil on a rooftop is infinitely better than a grand plan that never leaves your head.
Your roof is ready. The only question is: are you?
Frequently Asked Questions
1. Do I need special permission to start a rooftop garden?
It depends on where you live and whether you own or rent. Most cities require permits for structural changes or large-scale installations. If you rent, always get written consent from your landlord. Start by checking your local building codes.
2. How much weight can a typical rooftop handle?
Most residential rooftops are designed to hold around 20–30 pounds per square foot for regular loads. A rooftop garden can require 80–150 pounds per square foot or more. Always consult a structural engineer before adding significant weight.
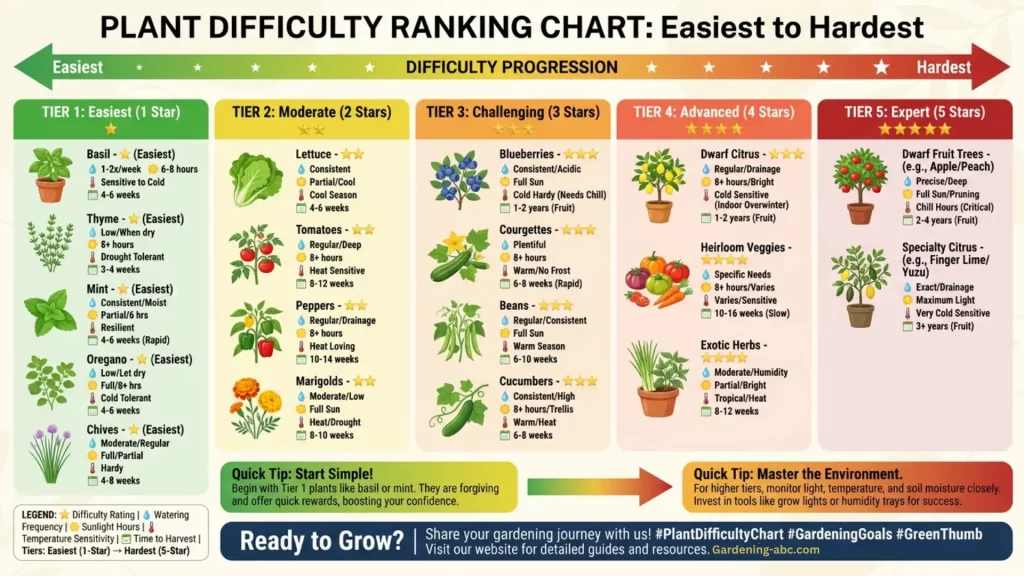
3. What are the easiest plants to grow on a rooftop?
Herbs like basil, thyme, and rosemary are excellent starters. Cherry tomatoes, lettuce, radishes, and strawberries are also beginner-friendly and highly productive in rooftop conditions.
4. How do I keep my rooftop garden watered when I travel?
Drip irrigation systems with smart timers or self-watering containers are your best bet. Set up an automated system before you leave, and ask a neighbor to check in occasionally for peace of mind.
5. Is rooftop gardening worth it financially?
Absolutely — especially over the long term. While there are upfront costs, the savings on fresh produce and herbs, combined with potential energy savings (from insulation provided by green roofs), make rooftop gardening a smart financial investment for many homeowners and renters alike.
Amazon and the Amazon logo are trademarks of Amazon.com, Inc, or its affiliates.
Love your lush garden..Looks really great, very inspiring.
Truly enjoyed reading this article. Lots of important information vital for the growth and well being of the plants. Sodding Toronto
This is totally awesome.Although variety of article on this topic,this article contains some of the precious
points which can never be read in other articles.
Your contents are too straightforward to browse and easy to understand.The Tree Center