We use affiliate links to run our site. When you buy through links on our site, we may earn an affiliate commission, without any added cost to you. Learn more
It’s high time that we understand the importance of organic gardening to beat all the future hazards, land degradation. We have numerous articles on the subject of organic gardening on this site.
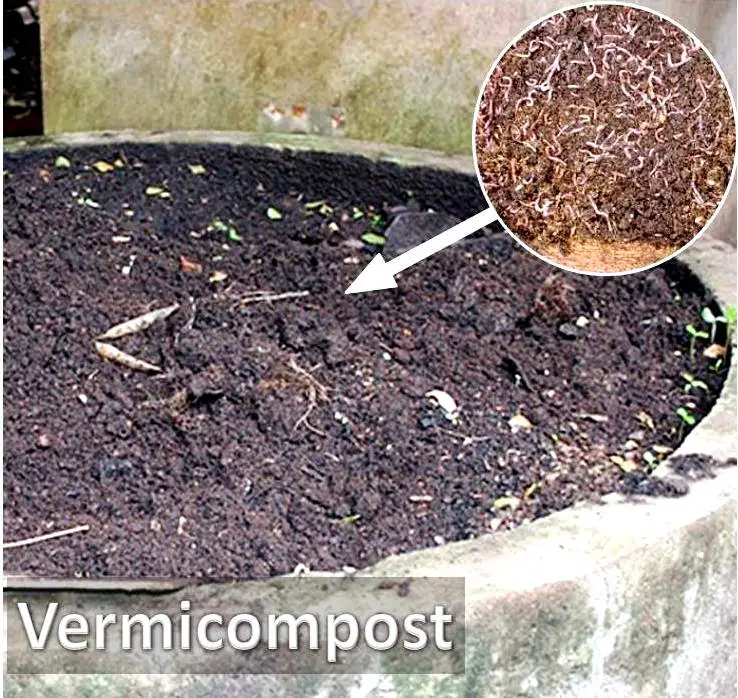
To continue our journey, here in this post, we will discuss one of the amazing alternatives to chemical fertilizers, the Vermicompost.
We will show you how, with the help of earthworms, you can convert vegetable waste to a 100 percent natural plant fertilizer.
So without further ado, let’s begin…
What is Vermicomposting?
Vermicompost is a type of organic fertilizer that is produced by composting organic waste using various species of earthworms. In other words, it is a mixture of decomposed organic wastes mixed with worm castings. Vermicomposting is the process of making vermicompost.
As worms eat their way through organic matter, they leave behind castings (digested organic matter rich in nutrients and beneficial microbes). These microbes can help your plants by
- Controlling harmful bacteria,
- Helping fight off disease, and
- Nourishing your plants with readily absorbed nutrients.
Why Vermicomposting is Important:
Vermicompost is a very useful organic fertilizer. It is enriched with water-soluble nutrients. They are a good source of many plant nutrients like NPK, sulfur, calcium, magnesium, and iron. You will also find trace elements such as manganese, Zinc, Copper, Boron, and molybdenum.
Vermicompost is very important for gardeners because:
- Unlike traditional compost, Vermicompost has higher levels of plant-available nutrients, particularly nitrogen and phosphorus.
- It increases the water retention capacity of the soil. This is particularly helpful if you have sandy soil in your garden. It can also increase the internal drainage of the clay soil.
- Vermicompost is filled with numerous beneficial bacteria that can help in plant growth. Healthy soil generally has at least 5% organic material; over time, that number can fall. Adding vermicompost to soil can help restore that balance.
- Vermicompost keeps the pathogens in a non-virulent form. So they cannot attack plants. It can also help stave off pest attacks.
- Studies show that worm castings can help you achieve a higher yield with crops like strawberries, tomatoes, peppers, and more. Sometimes the vermicomposts also have some hormones that promote plant growth.
- Earthworms and the microbes found in lively vermicompost can remediate soil that is contaminated with hydrocarbons, agrichemical pollutants, or heavy metal-free radicals.
Composting Ingredients:
Worms create a blend of different composting ingredients. You can enrich the quality of the soil many times by adding vermicompost to it. It is considered to be a very high-quality organic fertilizer.
Worms in a general situation eat plenty in a whole day, and with that proportion, they release the casting. The most interesting fact is that their casting contains 8 times more microorganisms than their food. These organisms do wonders for the plants. Besides, the cast is also pathogen-free.
This cast is more full of nitrogen (N), phosphorus (P), and Potassium (K) than the normal soil. If you remember (in our earlier article we discussed this), these 3 minerals are essential for any plant’s growth. These casts are also rich in humic acid, which is very beneficial for any plant.
Several countries like the USA, Canada, Japan, etc., practice vermicompost on larger scales for agriculture. But you can also practice it in your own house. All you need are these basic materials:
- A container
- Bedding
- Water
- Worms
- Kitchen scraps
The Containers/Bins:
Bins can be of two types: commercial bins and homemade bins.
A good worm composting bin is easy to use and efficient. The size of a bin depends on the number of worms. Remember, worms need more floor space than headroom.
So, ideally, shallow trays are fine for preparing vermicompost. Make sure your bin has proper drainage and ventilation; otherwise, the composting won’t work.
There are a number of fine commercial bins available, or the handy among us can build their own.
Commercial Bins:
Commercial bins are a good choice to prepare vermicompost because they are already designed to do the work. You can use them in the basement, outdoors, or at the corners of your room. If your bins have layered trays, it will help you during the harvest.
A compost bin like this is ideal for preparing worm compost. The trays here are designed in a way that worms can migrate to the next level. And when they leave, you can remove the older ones and take out the compost with ease. You can repeat the process and get worm compost whenever you like.
Homemade Bins:
You can also make your own bins. Wood, clay, and plastic, you can use any material to make the bins, just make sure they are opaque because worms do not like light. Use some kind of cover to protect the moisture as well as to prevent the light from the top.
Bedding:
Bedding is one of the most important parts of the vermicomposting process. It takes almost 50% of the total area of the container. Bedding is home for the worms, so this has to be ideal for them.
You can make the bedding with strips of newspaper or shredded grocery bags, cardboard, egg cartons, old leaves, coconut coir, or a mixture of any of these substances.
Whichever material you choose to prepare the bed, it has to be non-toxic and clean. The bedding should be damp but not soggy.
Water:
Water is crucial for the functioning of the system. Worms breathe through their skin. That works best in a moist environment. So you need to make sure the bedding remains damp.
Excess water can also be a problem. After a while, moisture starts forming at the bottom of the bed. The best way to solve this problem is to use coco coir. Fill an old sock with coco coir and place the sock at the bottom of the container. This will soak up all the excess water from the compost.
After some time, you can pull out the sock, squeeze out the excess water, and again place it back at the bottom of the bin. The squeezed-out water is filled with nutrients; use it to fertilize plants.
Worms:
You cannot use any worm to prepare vermicompost. Not all worms don’t like organic wastes. Most of the worms that we generally see in our garden don’t work.
The worms we use in preparing vermicompost are red wigglers (Eisenia foetida) or manure worms(Lumbricus rubellus). Always order your worms from a dependable supplier to avoid future inconvenience.
You can either use worms and kitchen waste at a 1:1 or 2:1 ratio, i.e, for 1 pound to 2 pounds of worms per 1 pound of kitchen waste. Remember, they can multiply very quickly (can double their population in 3 months’ time). So you can also start slowly with a smaller number of worms and see how things are working.
Kitchen Scraps/ Food for the Worms:
Kitchen scraps like fruit scraps, vegetable peels, tea bags, and coffee grounds are all good for the worms. Just like we discussed in the composting avoid meat or meat by-products, and dairy products. These attract pests like flies and rodents.
After the initial feed, feed the worms once every week in small amounts. Adding too much waste can result in stinky compost. You can speed up the process of composting by either increasing the number of worms or following these steps.
How to Vermicompost:
Half-fill the compost bins with bedding. Then add a handful of dirt or sand and some crushed eggshells. Now add the kitchen scraps. Mix some water to make it moist; after that, add the worms into the mix. They will eat the mixture and create casts for you to use.
A word of caution:
Do not use any material such as bottle caps, polythene bags, aluminum foils, etc. Avoid any type of insecticides or chemicals near the bin. These will kill the worm population.
Do Worm Bins Smell?
Ideally, vermicomposts don’t have any foul smell. They are dark black in color and have a pleasant, earthy smell.
But sometimes it develops a rotten smell. This has nothing to do with the worms but rather with the composting ingredients. It may be that the food is not buried deeply enough or just have too much compared to the number of worms.
- So make sure the foods are buried deeply.
- Remove the rotten ones and stop giving the worms more food.
- Check whether the holes around the bottom of the bin are clear and the underside is properly ventilated.
Harvesting Vermicompost:
Although the time for harvest varies depending on the size of the compost bin, usually, it will take around 6 months before you are able to harvest worm compost for the first time. After that, you can take out the casting monthly.
Set your bin up in the fall. Continue feeding the worms for 3-4 months. After that, you don’t need to touch the bins anymore. It will take another couple of months. The worms will eat any leftover food that remains in the bed. By this time, most of the worms will die, and you will get pure worm casting.
If you want to use the worms again, you have to move them continuously every 3-4 months. This method will give you continuous vermicompost, but it will not be as pure as the earlier one and will have worm casting as well as some leftover food. Nevertheless, it will have a high nutrient value for the plants.
Vermicomposting is a fantastic way to convert your kitchen scraps into fertile manure. You can use earthworms to convert your kitchen waste into manure (worm cast and some decayed materials), which you can then add to your window boxes. This acts as a buffer to reduce excessive acid or alkalinity present in your soil.
It will also help to store nutrients and retain moisture. A general recommendation is to add vermicompost and normal soil in a 1:10 ratio.
Amazon and the Amazon logo are trademarks of Amazon.com, Inc, or its affiliates.
That’s a good idea, to do small scale composting, but I don’t know what you refer to as “bedding”. Thanks.