We use affiliate links to run our site. When you buy through links on our site, we may earn an affiliate commission, without any added cost to you. Learn more
Onions are photoperiodic solar engines. They don’t bulb just based on age or size. Instead, they wait until they’ve gotten a specific amount of daylight. That sunlight triggers hormones that turn the base of the leaves into those fleshy rings we eat. source
So, if you want to grow big, sweet onions that store well, you need to time it right. Make sure your plants have enough time to grow plenty of leaves before the days get long enough to trigger bulbing. If you get that balance right, you’ll end up with onions that can last six to nine months in your pantry.
In this guide, we’ll answer the ten questions that trip up almost every first-time onion grower. We’ll cover everything from picking the right onion variety and starter materials to spacing, feeding, and pest control.
We’ll also dive into why they bolt, when to harvest, how to cure them properly, and even the science behind what makes them spicy.
So let’s begin…
From Seeds to Sprouts: How to Easily Grow Onions At Home
Q1: Should I Start Onions from Sets, Seeds, or Transplants?
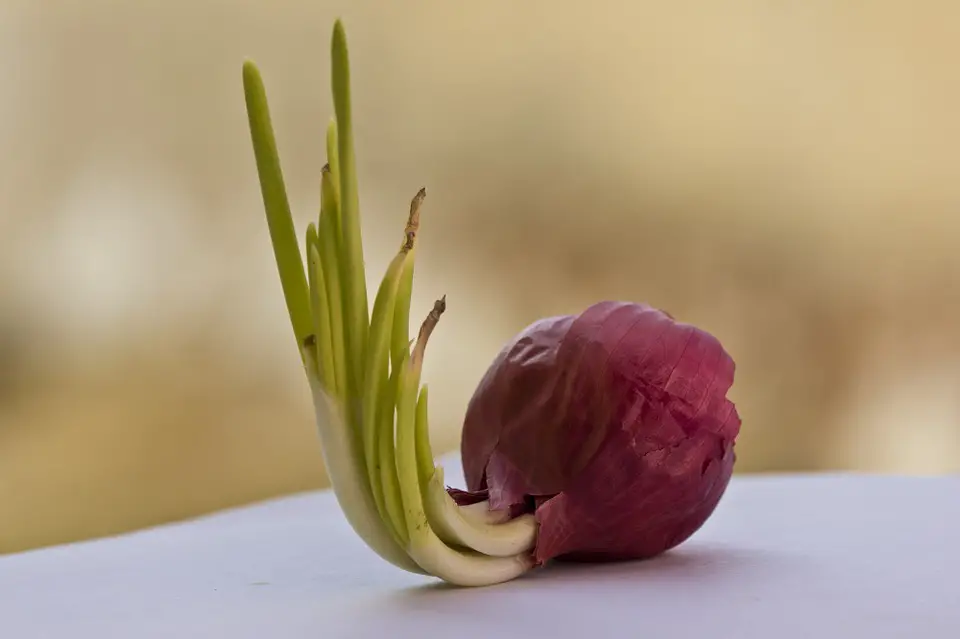
Most beginners grab onion sets—those small, dormant bulbs you find in mesh bags at garden centers—because they’re the quickest way to get plants in the ground with zero germination hassle. But that convenience comes with a catch.
Since sets have already started their life cycle, they’re more likely to bolt, i.e, they’ll send up a flower stalk too early if spring temperatures swing. Plus, you’re usually stuck with just a few varieties, like a yellow storage type, a red, and maybe a white.
Experts, on the other hand, choose transplants—those bare-root seedlings that are pencil-thin and 6 to 8 inches tall. They have a much lower risk of bolting, grow bigger bulbs, and give you access to a wider range of varieties, including ones that store well. They also skip the ten-week indoor germination wait.
Then there are seeds. They’re the most budget-friendly option, costing just a penny or two per plant, and they let you choose from the entire catalog of long-storage hybrids. When timed right, they also have a low bolting risk. The downside? You’ll need to start them indoors 8 to 12 weeks before your last frost date. Source
| Parameter | Sets | Bare-Root Transplants | Seeds |
| Bolting Risk | High (already partially vernalized) | Low | Low (with correct timing) |
| Days to Maturity | ~80–90 days from planting | ~90–110 days from transplant | ~100–130 days from seed |
| Cost per Plant | 0.04–0.06 | 0.08–0.15 | 0.01–0.02 |
| Bulb Size Potential | Moderate (limited by pre-existing bulb size) | High (full genetic potential) | Highest (full season of leaf growth) |
| Storage Life Expectancy | 3–5 months (thick-necked types dominate) | 6–9 months (varietal dependent) | 6–12 months (long-day storage hybrids) |
Expert recommendation: If you are a first-year grower in a hurry, sets will get you a harvest. But if you want maximum yield and winter storage, order bare-root transplants or start seeds indoors ten weeks before your last frost.
Q2: What Are “Short-Day,” “Long-Day,” and “Day-Neutral” Onions?
Onion cultivars are classified by the minimum daylight hours required to trigger bulb initiation. This is not a preference—it is a hardwired genetic threshold. If you plant the wrong class for your latitude, you might get either tiny premature bulbs or, worse, no bulb at all.
Short-Day (10–12 hours daylight): These varieties initiate bulbing when days reach 10 to 12 hours of sun. They are suited for southern latitudes (roughly Zone 7 and south, approximately 25°N to 37°N). In the United States, these are planted in autumn and harvested in late spring—Texas, Georgia, and New Mexico are major short-day production regions. Think Vidalias, Texas Granex, and Creole types.
Long-Day (14–16 hours daylight): These varieties require 14 or more hours of daylight to begin bulbing. They are suited for northern latitudes (Zone 6 and north, roughly 37°N and above). Planted in early spring, they build foliage through spring and bulb during the long summer days of June and July. Patterson, Copra, and Walla Walla fall into this category.
Day-Neutral / Intermediate (12–14 hours daylight): These transitional varieties bulb at intermediate day lengths and are the most versatile across the central belt of the continent (roughly Zone 5b to 7a, or 32°N to 42°N). They can be planted in spring and harvested mid-summer. Varieties like Candy and Red Candy Apple are widely adaptable day-neutral types.
Latitude Day-Length Selection Map
| Latitude Range | USDA Zone Approx. | Correct Day-Length Class | Planting Window |
| 25°N–32°N | Zone 8–10 | Short-Day | Autumn (Oct–Nov) |
| 32°N–37°N | Zone 7–8 | Short-Day or Day-Neutral | Autumn or early spring |
| 37°N–42°N | Zone 5–7 | Day-Neutral or Long-Day | Early spring |
| 42°N–50°N | Zone 3–5 | Long-Day | Early spring (as soon as soil works) |
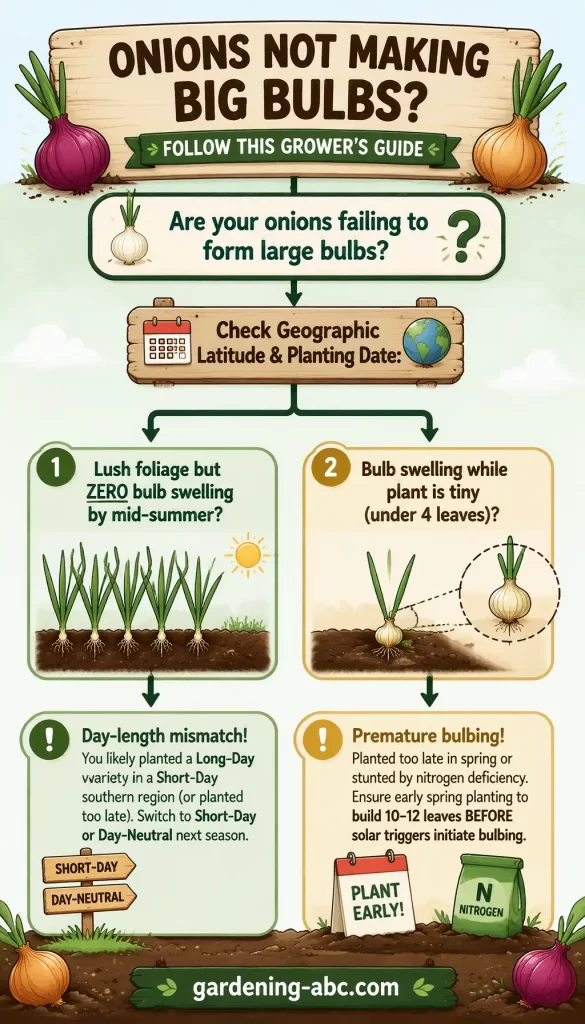
Critical diagnostic: If your onions are growing lush foliage but zero bulb swelling by mid-summer, you almost certainly planted a long-day variety in a southern short-day region—or planted too late for your class. The plant never sees enough daylight hours to trigger bulbing.
Q3: Why Are My Onions Small or Forming No Bulbs at All?
Every single onion leaf above ground becomes one fleshy ring layer inside the bulb below ground. This is the Leaf-to-Ring Engine: thick, healthy, numerous foliage leaves automatically build thick, juicy, large bulb rings.
Achieving 10 to 12 healthy leaves before the photoperiod trigger initiates bulbing can increase final bulb weight by up to 150% compared to stress-stunted 6-leaf plants. Once bulbing begins, the plant stops producing new leaves—whatever leaf count you have at that point is the maximum ring count your bulb will ever have.
The most common failure modes:
- Late planting: Leaves never reach critical count before daylight triggers bulbing—result is a golf ball instead of a baseball.
- Overcrowding: Plants spaced 2 inches apart compete for light, water, and nutrients, stunting leaf production.
- Nitrogen deficiency in early growth: Onions are heavy nitrogen feeders during the vegetative (leaf-building) phase. Starved plants produce thin, pale leaves that translate into thin, sparse bulbs.
Is Onion A Fruit, A Root or a Vegetable? Here’s the Science Behind It
Q4: How Deep and How Far Apart Should I Plant Onions?
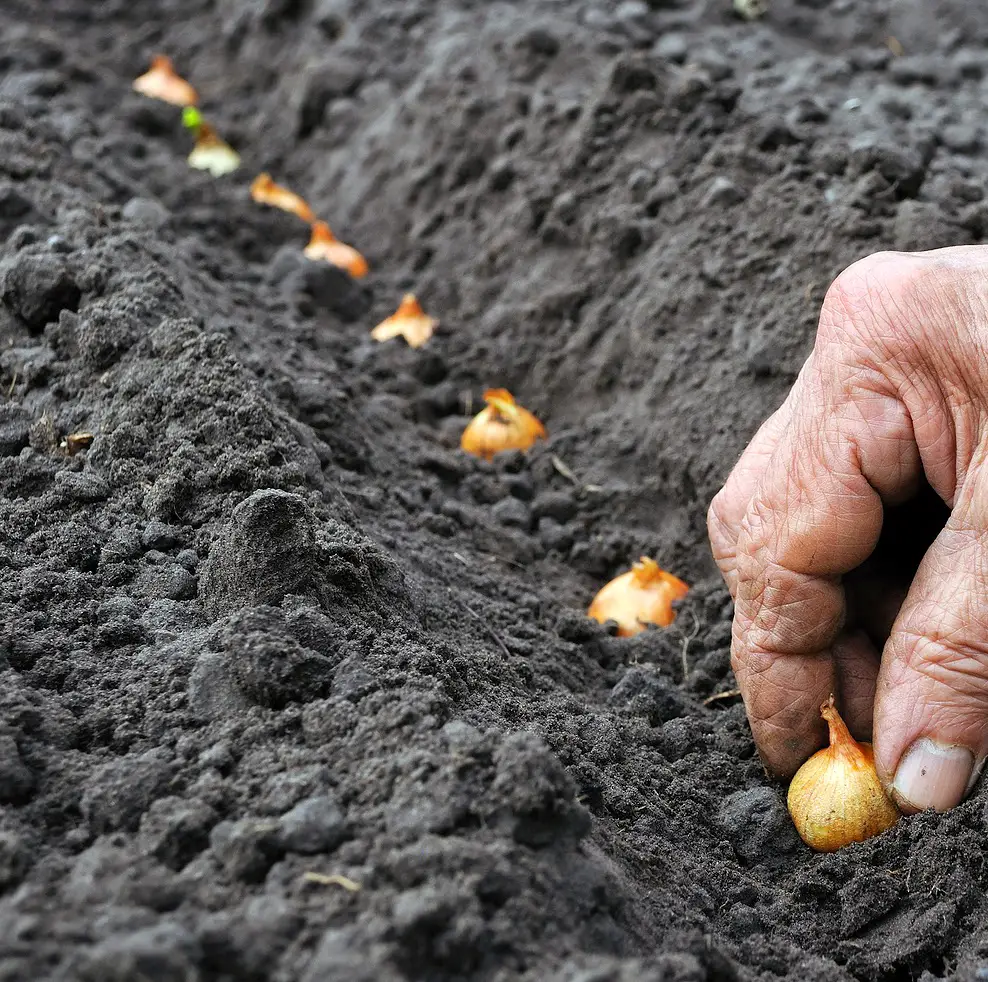
Onions are geophytes—the bulb needs to push through soil to expand. Planting too deep forces the bulb to elongate vertically through compacted soil, producing narrow, cylindrical “bottle-shaped” onions instead of round ones.
Depth Rules
- Sets: Push into soil so the pointed tip is just protruding above the surface. Do not bury them.
- Bare-root transplants: Plant 1 inch deep. The roots go down; the base of the green shoot sits at soil level. Burying the white portion of the stem too deep encourages rot and suppresses bulb expansion.
- Direct-sown seeds: Sow 1/4 to 1/2 inch deep; thin to final spacing when seedlings are pencil-thin.
Spacing Dynamics
| Spacing Parameter | Distance | Rationale |
| Between plants in-row | 4–6 inches | Allows full bulb expansion without competition; 4 inches for medium varieties, 6 inches for large sweet types |
| Between rows | 12–18 inches | Permits airflow for disease suppression and tool access for weeding |
| Band planting (intensive) | 3 inches in blocks 10–12 inches apart | Higher density for smaller-bulb storage types; suited for raised beds |
Expert diagnostic: If bulbs are expanding but are elongated rather than round, you planted too deep or your soil is too compacted. Loosen beds to a depth of 6 to 8 inches and raise the planting position so the bulb sits at or just above the surrounding soil line.
Q5: Why Are My Onions Sending Up Flower Stalks (Bolting)?
Bolting happens when an onion prematurely shoots up a flower stalk, usually triggered by temperature stress. Since onions are biennials, they naturally flower in their second year after experiencing a cold period.
The problem often starts with dormant sets. If you store them in a warm indoor space, plant them in the spring, and then hit them with a cold snap (typically below 45°F for 10 to 20 days), the plant gets confused. It thinks it has successfully “overwintered” and rushes into its reproductive phase to flower instead of growing a bulb.
Causes
- Large sets: Sets larger than a nickel have already accumulated significant vernalization credit. Grade your sets and plant only the smallest (dime-sized) ones for storage; cook the large ones as spring onions.
- Temperature fluctuations: A warm spell followed by a hard cold snap triggers the biennial reproduction impulse.
- Late planting of sets in cold soil: The plant sits in cold, wet soil and partially vernalizes before growth begins.
Correction Protocol
- Snap the scape immediately when you notice it—grab the stalk at its base and bend it sharply until it breaks. This redirects energy back into bulb growth.
- Mark bolted plants with a stake or flag. These onions will develop a hard, woody central core where the scape was. They will not store.
- Harvest and consume bolted onions first—roast them, caramelize them, freeze them as diced prepped onions. Do not cure them for winter storage, as the open scape channel invites rot organisms directly into the bulb interior.
Expert observation: A bolted onion feels different when you squeeze it. Instead of a firm, uniform density, you feel a rigid central column surrounded by softer flesh. That central core never softens and creates a rot pathway.
Q6: How Much Water and Fertilizer Do Onions Need?
Hydraulic Profile
Onions have shallow, unbranched root systems—most roots sit in the top 12 inches of soil with minimal lateral spread. They cannot access deep moisture reserves and are highly sensitive to both waterlogging and drought.
| Growth Phase | Water Requirement | Notes |
| Establishment (weeks 1–3) | 1 inch/week, light frequent | Keep surface moist for rooting; do not allow soil to crust |
| Vegetative (leaf building) | 1–1.5 inches/week | Consistent moisture drives leaf production; any drought stress here permanently limits bulb size |
| Bulbing | 1 inch/week, tapering | Maintain steady moisture for cell expansion; fluctuations cause double or split bulbs |
| Tops-down / pre-harvest | Withhold all water | Once 50% of necks fall, stop irrigation entirely to allow outer scales to dry and cure in the soil |
Nutritional Timeline
Early vegetative phase (first 4–6 weeks): This is when nitrogen matters most. Apply a balanced fertilizer (e.g., 10-10-10) at planting, then side-dress with a nitrogen source (blood meal, ammonium sulfate, or fish emulsion) every 2 to 3 weeks. The goal is to drive maximum leaf count before photoperiod triggers bulbing.
Bulbing phase (once bulbs begin swelling): Cut nitrogen entirely. Continuing to feed nitrogen during bulbing produces “bullnecks”— thick, rigid stems that never soften and seal. These onions are rot-prone and will not store beyond a few weeks. Switch to a low-nitrogen, higher-potassium formulation if any supplementation is needed during bulb fill.
Nitrogen Feeding & Cut-Off Timeline
| Weeks After Planting | Action | Rationale |
| Week 0–2 | Apply starter fertilizer (10-10-10) | Root establishment and early leaf initiation |
| Week 3–6 | Side-dress nitrogen every 14 days | Drive maximum leaf count (target: 10–12 leaves) |
| Week 7–8 | Monitor for bulb initiation | Look for basal swelling; leaf tips may begin yellowing naturally |
| Week 9+ (bulbing confirmed) | Nitrogen cut-off | Prevents thick necks; redirects carbohydrates into bulb storage tissue |
Q7: How Do I Control Weeds and Pests (Thrips & Maggots)?
Onions cannot shade out weeds. Their upright, narrow foliage leaves create no canopy, and their shallow root system loses every resource competition. A weed canopy over your onions will stunt leaf development and reduce your final ring count permanently.
Weed Management
- Mulch with straw or shredded leaves at 2 inches depth once seedlings are established (after transplanting or direct-sow thinning). Avoid heavy mulch that traps moisture against the neck.
- Hand-weed close to plants—onion roots are shallow, and hoe cultivation deeper than 1 inch will sever them.
- Pre-emergent flame weeding between rows is highly effective for intensive growers.
How To Kill Weeds Naturally Without Any Chemicals
Pest Identification & Solutions
| Pest | Identification Signal | Damage Mode | Correction |
| Thrips | Silver-white stippling and scratches on leaf surfaces; leaves appear silvery when viewed from a distance | Piercing-sucking mouthparts collapse leaf cells, reducing photosynthetic area and limiting bulb fill | Spray leaves with a firm water jet in early morning; apply insecticidal soap or neem oil at first sign; repeat every 7–10 days until controlled |
| Onion Root Maggot | Wilting, yellowing leaves on otherwise healthy plants; tunnels visible in bulb base when pulled | Larvae feed on roots and bulb base, causing plant collapse and rot | Install floating row covers at planting to exclude adult flies; practice 3-year crop rotation out of alliums; avoid planting near previously infested allium beds |
| Downy Mildew | Purplish-gray fuzzy growth on leaf surfaces in cool, wet conditions | Foliar disease that kills leaves prematurely, halting bulb development | Improve airflow spacing; avoid overhead irrigation; apply copper fungicide preventatively in humid climates |
Companion planting note: Interplanting onions with carrots is a well-documented mutual pest disruption strategy—onion scent confuses carrot rust fly, and carrot scent confuses onion maggot fly. Brassicas planted nearby can also disrupt pest locating behavior.
Q8: When Exactly Are Homegrown Onions Ready to Harvest?
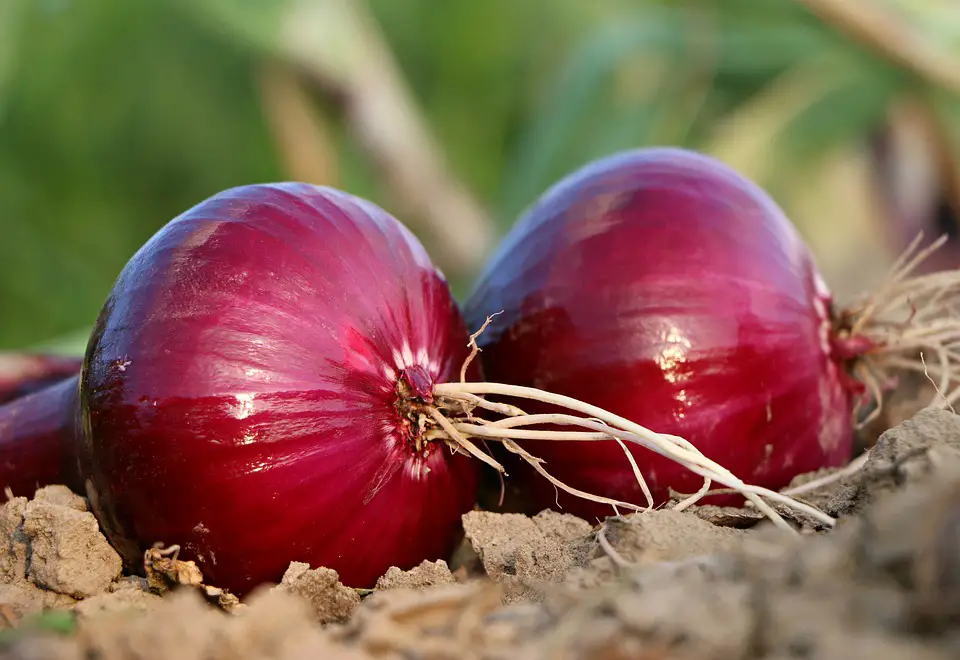
The single most common beginner error is harvesting too early—pulling onions while tops are still standing upright and green. This produces thick-necked, waterlogged bulbs with no protective papery skin, guaranteed to rot within weeks.
Wait until 50 to 70% of your crop’s necks naturally weaken and fall over on their own. The plant is signaling that it has finished transporting carbohydrates from the foliage into the bulb, and the neck is sealing shut.
Commercial short-day harvest standards reference 50 to 80% leaf collapse as the harvest readiness indicator.
Harvest Sequence
- Tops-down phase: Once 50% of necks have fallen, withhold all water. This is not optional. Allow the outer papery scales to begin drying in the soil—this in-ground pre-curing forms the first layer of the storage armor.
- Wait 5 to 7 days after stopping irrigation (watch the weather—if heavy rain is forecast, proceed to harvest).
- Harvest on a dry, warm, breezy day. Loosen soil with a fork (do not pull by the neck—this can damage the seal). Lift gently and lay onions flat on the soil surface for a few hours of field drying if conditions are dry.
- Do not cut tops yet. Leave them intact for the curing process—the green tops continue drawing residual moisture out of the neck during drying.
Expert observation: A properly ready onion, when lifted, will have a neck that bends cleanly at the junction rather than remaining rigid. If you bend the neck and it snaps with resistance, it has not finished maturing. If it folds like soft paper, it is ready.
Q9: How Do I Cure Onions for Long-Term Winter Storage?
Curing is not simply drying—it is the biological process of sealing the neck stem to create an airtight, fungal-resistant barrier that preserves internal moisture for months. Think of onion skins and dry necks as biological armor.
The Curing Physics
When an onion is harvested, the neck stem is an open wound—moisture escapes, and fungal spores can enter. Curing slowly desiccates the outer 2 to 3 layers of skin into papery scales and shrinks the neck tissue until it is sealed shut. This takes 2 to 3 weeks under specific conditions:
| Curing Parameter | Optimal Range | Purpose |
| Temperature | 75–85°F (24–29°C) | Warm enough to drive moisture out without cooking the bulb |
| Airflow | High—breezy or fan-assisted | Carries away evaporated moisture; prevents mold |
| Humidity | Low (below 65%) | Dry air pulls moisture from neck tissue efficiently |
| Light | Shaded/diffuse | Direct sun can sun-scald and excessively heat bulbs |
| Duration | 2–3 weeks | Until roots are woody and brittle, necks feel like dry paper, outer skins are papery and rustle |
DIY Curing Protocol for High-Humidity Environments
If you live in a humid climate (summer dew points above 65°F), passive curing may take too long and risk mold:
- Lay onions on wire racks or slatted shelves—not flat surfaces—so air circulates underneath.
- Position an oscillating fan on low, 6 feet away, running 24/7 for the first 5 days to establish airflow.
- If humidity exceeds 70%, add gentle supplemental heat—a space heater on low (thermostat set to 80°F) in an enclosed shed or garage. Never exceed 90°F; you will cook the onions and trigger enzymatic breakdown.
- Turn onions once after the first week to ensure even drying.
- Quality verification audit: After 2 weeks, test a sample onion. Cut the neck 1 inch above the bulb. If the interior is dry, pale, and hollow-feeling with no green or juicy tissue, the seal is complete. If you see green or moisture, cure for another 5 to 7 days.
Storage Post-Curing
| Storage Condition | Temperature | Humidity | Expected Shelf Life |
| Cool, dry basement | 35–40°F (2–4°C) | 60–70% RH | 6–9 months (storage hybrids: up to 12 months) |
| Ambient pantry | 65–70°F (18–21°C) | Under 60% RH | 3–5 months |
| Refrigerator | 35–40°F | 85%+ RH | 1–2 months—humidity causes sprouting and mold |
Never store onions next to potatoes. Potatoes release moisture and ethylene gas that triggers onion sprouting and rot. Store each in separate, ventilated areas.
Q10: Why Are My Onions Extremely Pungent (or Mild)?
Onion spiciness is actually a measurable chemical reaction driven by volatile sulfur compounds. The main culprit is the tear-inducing gas that makes your eyes water, along with a group of compounds called thiosulfinates.
Here’s how it works: those compounds don’t exist until you cut the onion. When you slice through the cells, you break the walls and mix an enzyme called alliinase with sulfur-containing amino acids. That mix instantly creates the sharp, pungent compounds we associate with onion flavor.
The concentration of these sulfur compounds is controlled by two variables:
- Soil sulfur availability: Soil rich in organic sulfur—amended with compost, gypsum (calcium sulfate), or elemental sulfur—produces fiery, pungent onions with high pyruvic acid content and long storage life. Storage-type long-day varieties (Copra, Patterson) are bred for high sulfur uptake and typically test at 6 to 9 on a 10-point pungency scale.
- Water stress during bulbing: Drought-stressed onions concentrate sulfur compounds, producing hotter bulbs. Conversely, abundant moisture dilutes sulfur compounds, producing milder, sweeter onions.
The Sweet-Onion Paradox
Sweet onions like Vidalia (Georgia), Walla Walla (Washington), and Maui are grown in low-sulfur soils with generous irrigation. The result is a large, juicy, mild onion that tests at 2 to 4 on the pungency scale—but these onions have high water content, thin skins, and open necks that limit storage to 1 to 2 months.
| Onion Type | Soil Sulfur Level | Water During Bulbing | Pungency | Storage Life |
| Sweet/Vidalia type | Low (sandy, low-organic) | Abundant | Mild (2–4/10) | 1–2 months |
| Cooking/storage type | High (compost-amended, gypsum) | Moderate, tapering | Pungent (6–9/10) | 6–12 months |
Expert tip: If you want sweet onions, grow them in light, sandy soil with low sulfur and keep them well-watered. If you want winter storage onions with deep, savory flavor, amend your soil with compost or gypsum in the fall before planting and taper irrigation in the final weeks to concentrate sulfur compounds.
Conclusion & Season Preparation Checklist
Congratulations, you have now moved from novice to onion specialist. Once you understand the basics, the rest is quite simple: match your day-length class to your latitude, maximize leaf count before the photoperiod trigger fires, cut nitrogen at bulbing, harvest at 50% neck-drop, and cure for a sealed papery shield.
5-Step Season Preparation Checklist
- Determine your latitude and select the correct day-length class (Short-Day south of 37°N, Long-Day north of 42°N, Day-Neutral in between).
- Order transplants or start seeds indoors 10 to 12 weeks before your frost-free date. If using sets, sort for the smallest (dime-sized) bulbs to minimize bolting risk.
- Prepare beds with 6 to 8 inches of loosened, well-drained soil amended with compost. Add gypsum if you want pungent storage onions; skip it for sweet types.
- Map your nitrogen timeline: feed aggressively during leaf-building (weeks 0–6), cut nitrogen entirely at first sign of bulb swelling.
- Pre-position your curing setup: identify a warm, shaded, ventilated space with wire racks and a fan, ready for harvest day in mid-summer.
With the right variety and proper curing, a single 4×8-foot raised bed planted just 4 inches apart can produce over 60 onions. That’s enough to feed an average household for six to nine months, all for under $15 in supplies.
Once you get the rhythm down—planting transplants in spring, harvesting when the necks flop over in mid-summer, and letting them cure for three weeks in a shaded shed—you’ll never need to buy onions from the grocery store again.
And the best part? The system gets better every year as your soil improves and your timing becomes second nature.
Ready to plan your onion architecture? What growing zone are you in, and are you leaning toward sweet slicing onions or long-storing cooking types?
Amazon and the Amazon logo are trademarks of Amazon.com, Inc, or its affiliates.