We use affiliate links to run our site. When you buy through links on our site, we may earn an affiliate commission, without any added cost to you. Learn more
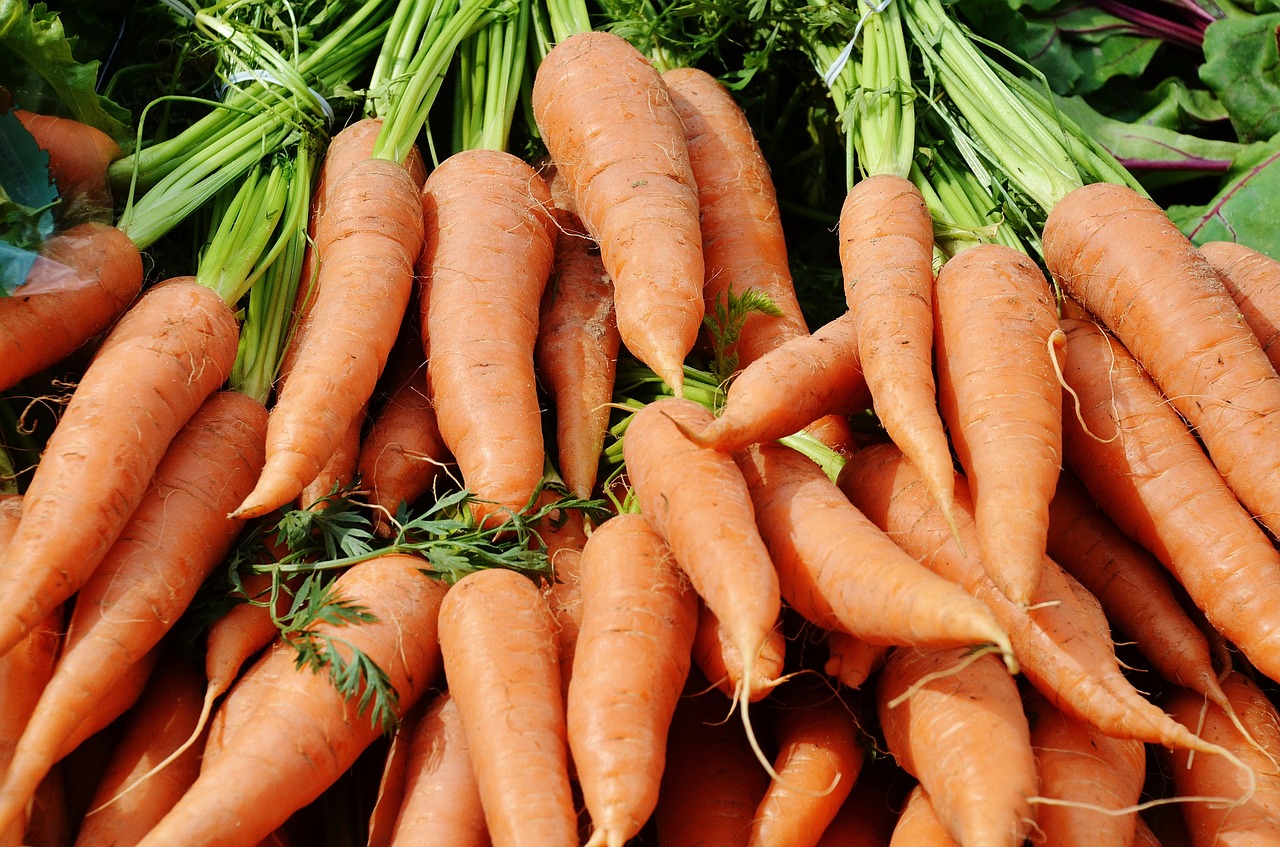
Growing carrots is quite easy even if you are a beginner.
The difference between forked, bitter roots and candy-sweet perfection comes down to three variables: soil friability (loose, crumbly texture), moisture consistency, and nutrient balance.
In this guide, we will answer the top 10 questions that make or break your first carrot yield.
Are you struggling with:
- ✓ Forked or twisted roots?
- ✓ Seeds that won’t germinate?
- ✓ Bitter, green-shouldered carrots?
- ✓ Choosing the right variety for your soil?
You’ll find the exact fix for each problem. These solutions are backed by soil science and tested by thousands of home gardeners.
You can grow carrots that are just as good as what you find at the farmers’ market. Start by picking the right seeds and use the cold-snap sweetening trick. Here’s what you need to know for top-notch carrots.
The 10 Critical Questions Every Beginner Asks
Q1: Why Are My Carrots Forked, Twisted, or Stunted?
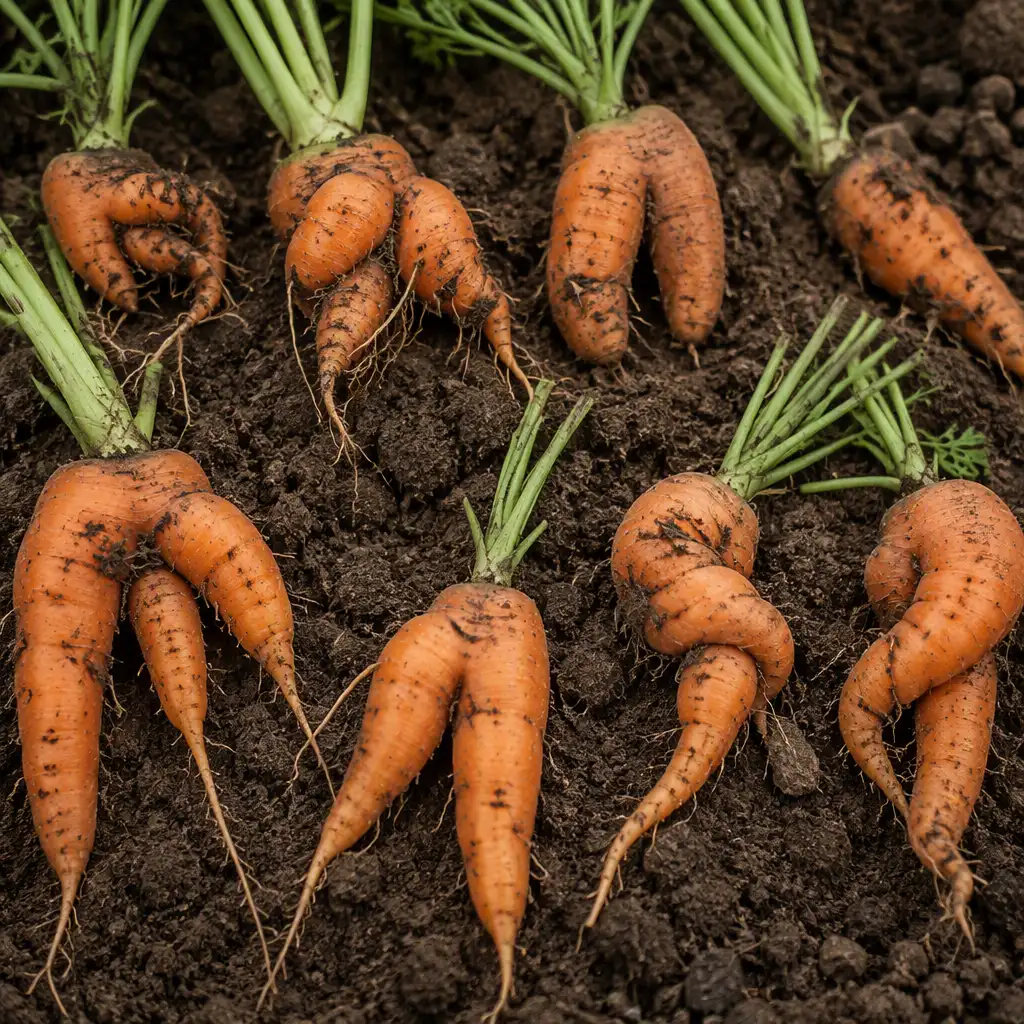
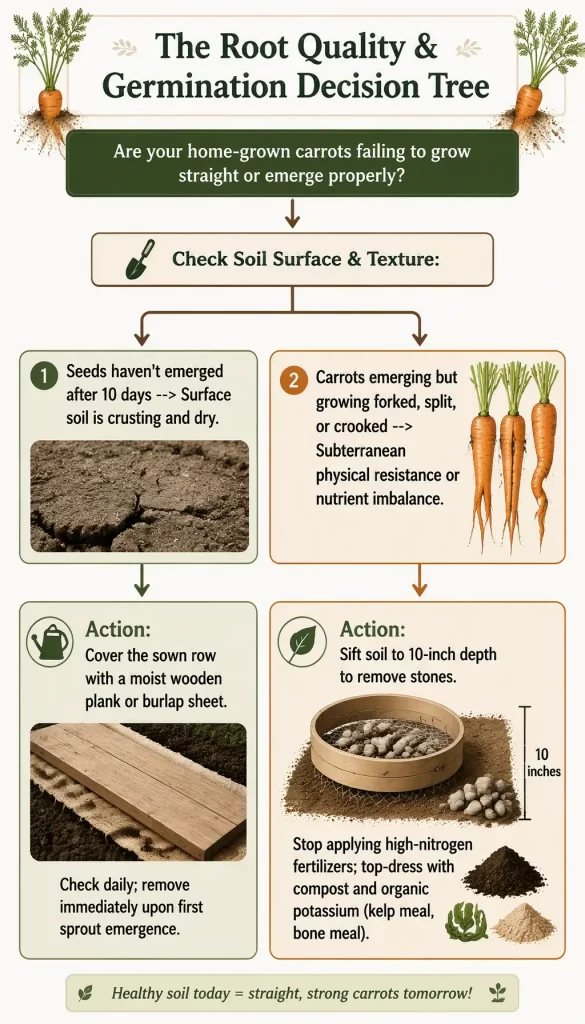
Forked carrots, in most cases, are due to soil obstacles (stones, hard clay, fresh manure). Remove all obstacles to a depth of 12 inches, and use loose, crumbly soil.
The Problem
A carrot taproot behaves like downhill-flowing water.
When it hits an obstacle like a stone, hard clay, or fresh manure, it splits and branches sideways instead of growing straight down.
This is the #1 reason home carrot crops fail.
Why It Happens
Forking occurs when the taproot hits an obstruction between 2–6 inches below the surface.
Fresh, uncomposted manure is one of the major causes of this forking. Its high nitrogen and undecomposed fragments cause roots to branch chaotically instead of pushing downward.
The Fix — 3 Steps to Prevent Forking
- Sift soil to 10–12 inches deep
- Remove every stone, stick, and clod larger than a pea.
- Use a garden sieve or ¼-inch mesh screen.
- Build the ideal growing mix
- 50% coarse horticultural sand or perlite.
- 50% sifted, well-aged compost or coconut coir.
- Mix thoroughly before filling your bed.
- Never use fresh manure
- Use only compost aged 6+ months.
- Fresh manure causes chaotic root branching.
- If you have fresh manure, age it in a pile for 6 months first.
Treat your growing carrot taproot like water flowing downhill. Your job is to make the entire soil column friction-free to a depth of at least 12 inches.
No obstacles = straight, perfect carrots.
Q2: Why Does It Take So Long for Carrot Seeds to Germinate?
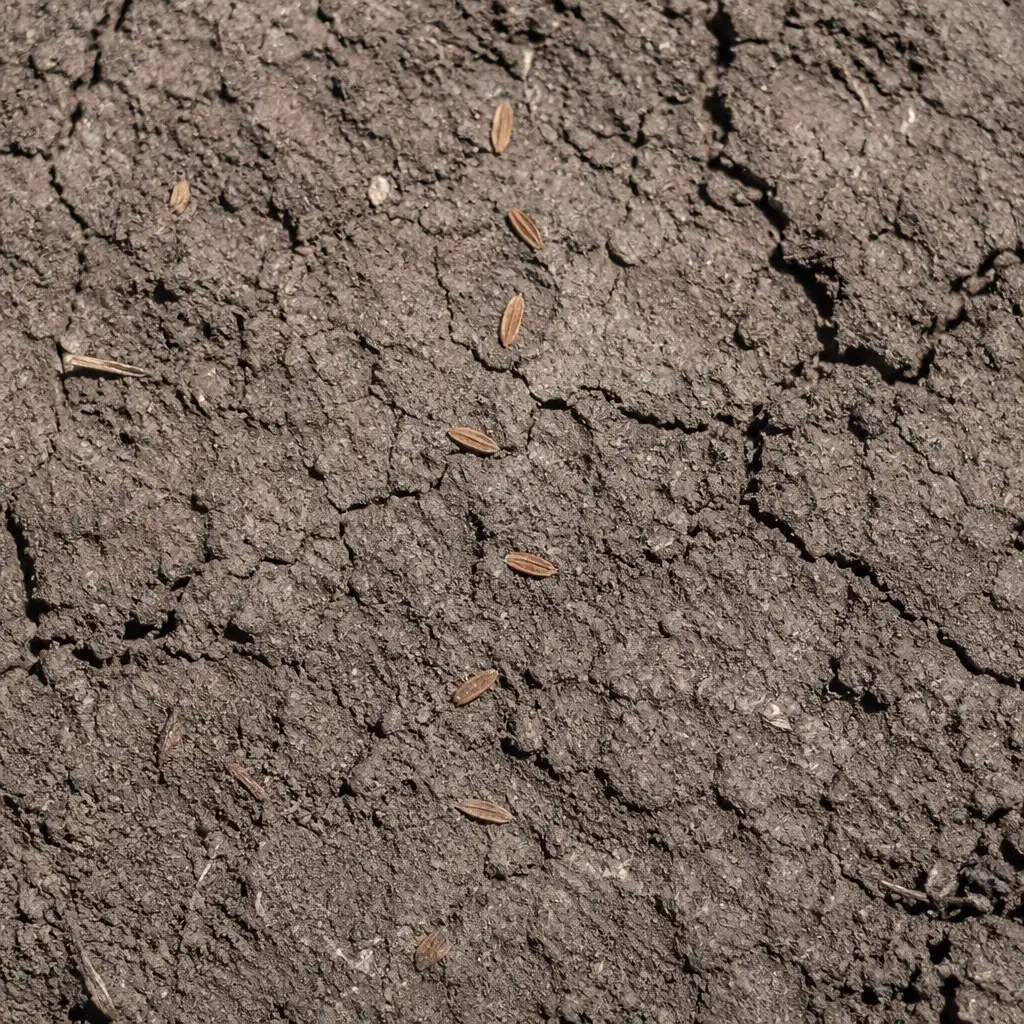
Quick Answer: Carrot seeds need 10–21 days to germinate. During this period, their seed coat must stay moist. Use the board-cover hack to speed this up and guarantee success.
The Problem
Carrot seeds are tiny, slow, and temperamental.
Their seed coat (called the pericarp) needs continuous surface moisture for 10–21 days to soften enough for the embryo to emerge.
Without constant moisture, the seed coat hardens, and the seed won’t sprout.
Temperature Matters
Optimal soil temperature for germination: 55–75°F
- Too cold (below 55°F) = germination slows dramatically, takes 21+ days
- Too hot (above 75°F) = surface soil dries too fast; seedlings die before emerging
- Just right (55–75°F) = germination in 10–14 days
The Solution [Step-by-Step]:
This simple trick traps 100% of surface humidity and guarantees germination.
- Sow seeds in shallow drills
- Plant ¼ inch deep
- Space rows 6 inches apart
- Water gently with a fine mist (don’t displace seeds)
- Cover the row immediately
- Lay a wooden plank, piece of plywood, or damp burlap sack directly over the sown row
- This traps moisture and blocks evaporation entirely
- No moisture loss = faster germination
- Check daily starting around day 7
- Look for the first pale sprout pushing through the soil
- The moment you see emergence, remove the cover immediately
- Timing is critical
- Leaving the board on too long causes seedlings to elongate, bleach, and die
- Check every morning and pull the cover the instant emergence begins
⚠️ Critical Mistake: Leaving the Board On Too Long
If you forget to remove the cover, seedlings will stretch, turn pale yellow, and collapse. Check daily. Remove immediately upon first sprout emergence.
Q3: Should I Grow Carrots in Beds, Raised Boxes, or Containers?
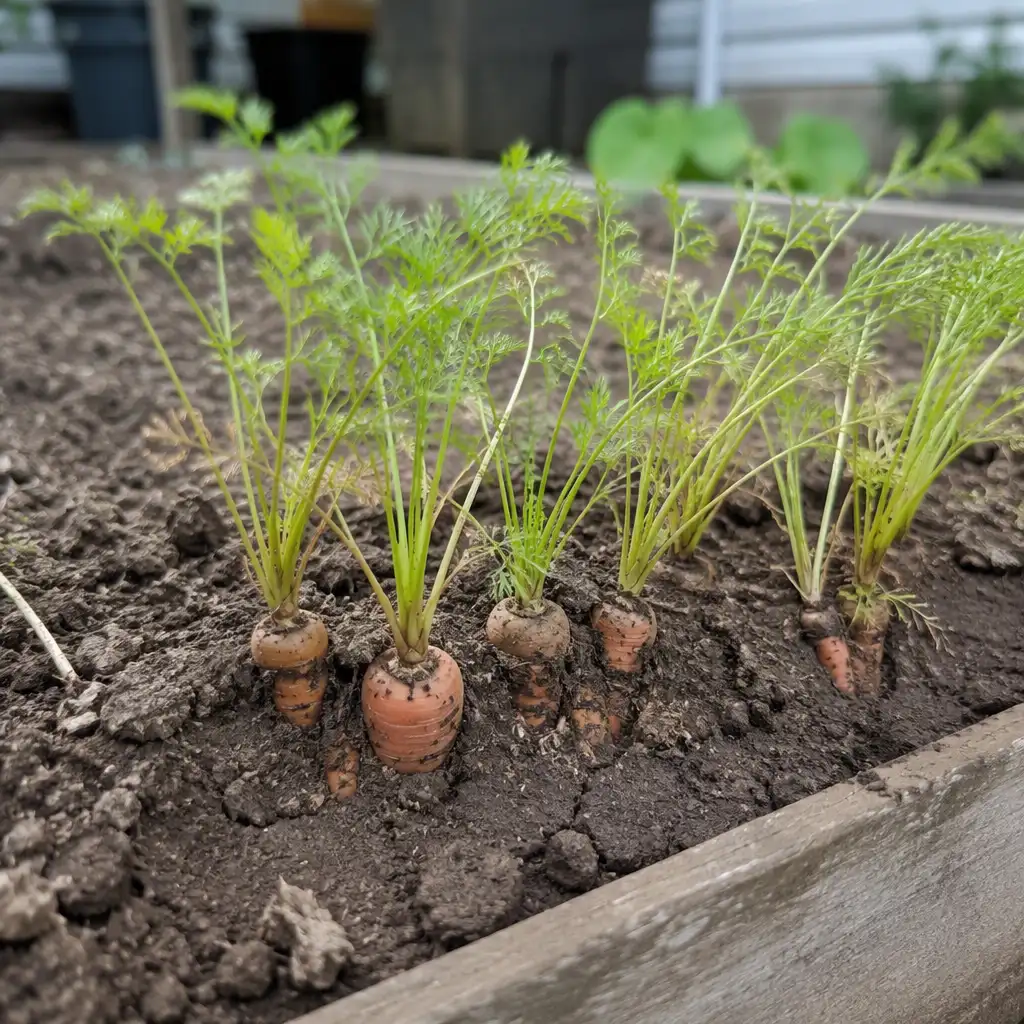
Carrots thrive in any container that provides 10–12 inches of depth and loose, crumbly soil. Here, the substrate matters more than the container itself.
Option 1: Container Growing (Best for Beginners)
Containers are ideal if you have poor native soil.
Requirements:
- Minimum depth: 10–12 inches.
- Must have drainage holes.
- Use a high-porosity mix:.
- 50% coarse horticultural sand or perlite.
- 50% sifted coconut coir or fine, sieved compost.
Best containers:
- Large pots (12+ inches deep)
- Wooden boxes
- Fabric grow bags
- Even 5-gallon buckets (drill drainage holes)
Option 2: Raised Bed Growing (Most Popular)
Raised beds warm faster in spring and give you complete soil control.
Setup:
- Build beds at least 10 inches tall
- Place over loosened native soil
- If your native soil is heavy clay, add a 2-inch layer of gravel or coarse sand at the bottom first
- Fill with sandy loam blend (see Option 1 mix above)
Advantages:
- Better drainage than in-ground
- Warmer soil in spring (faster germination)
- Easier to maintain consistent moisture
- No compaction from foot traffic
Option 3: In-Ground Growing (Only If Soil is Good)
In-ground growing only works if your native soil is already sandy loam.
If you have heavy clay soil:
- Heavy clay will produce forked, stunted roots every time
- Don’t attempt in-ground growing
- Use raised beds or containers instead
If you must amend in-ground:
- Double-dig the bed to 12 inches
- Mix in coarse sand and compost
- Takes significant effort and may still fail
- Stick with raised beds or containers (easier, more reliable)
Q4: How Do I Thin Carrot Seedlings Without Killing Them?
Overcrowding kills carrot crops. Use scissors to snip (never pull) seedlings. Thin in two stages: 1 inch apart at 2 weeks, then 2–3 inches apart at 3 weeks.
Why Thinning Matters
Overcrowded seedlings compete for nutrients, water, and root space.
Result: Thin, twisted, finger-sized roots instead of full-width carrots.
Each plant needs approximately 2 inches of soil radius to develop properly.
The Two-Stage Thinning Protocol
| Stage | Timing | Spacing | Method |
| First Thinning | Seedlings 2–3 inches tall (10–14 days after germination) | Thin to 1 inch apart | Snip extras at soil line with scissors |
| Second Thinning | Seedlings 8–10 inches tall (~3 weeks later) | Thin to 2–3 inches apart | Snip again; eat the thinnings as baby carrots |
How to Thin Properly
- Identify the weaker seedlings
- Keep the strongest, healthiest-looking plants
- Remove the smaller, spindly ones
- Use fine scissors
- Cut unwanted seedlings at the soil line
- Leave the root in the soil to decompose naturally
- Never pull by hand
- Pulling disturbs the root systems of neighboring seedlings
- Can snap developing taproots of keeper plants
- Always use scissors
- Eat the thinnings
- Baby carrot thinnings are tender and sweet
- Harvest them as you thin the second time
- Great for salads and snacking
⚠️ Critical Mistake: Pulling Seedlings by Hand
Pulling disturbs neighboring roots and snaps developing taproots. Use scissors only. This is non-negotiable if you want straight, healthy carrots.
Q5: Why Are My Carrots Hairy or Developing Multiple Roots?
“Hairy carrots” generally means too much nitrogen in the soil. Stop nitrogen feeding immediately. Top-dress with potassium and phosphorus instead. Aim for a 1-2-2 or 1-1-2 NPK ratio.
The Problem
Excess soil nitrogen triggers a carrot’s main taproot to abandon its downward mission.
Instead, it shoots out a mass of fibrous lateral secondary roots—the classic “hairy carrot” syndrome.
The root looks like it’s covered in a beard of fine white threads.
Why This Happens
High-nitrogen fertilizers (especially synthetic blends or fresh manure) signal the plant to prioritize top growth over root storage.
Result:
- Taproot becomes thin and woody
- Covered in hair-like feeder roots
- Searching for nutrients that aren’t there
- Roots become less sweet and more fibrous
The Correction — 3 Steps
- Stop all nitrogen-heavy feeding immediately
- No more synthetic fertilizers with high N
- No fresh manure applications
- No nitrogen-rich amendments
- Top-dress with potassium-rich organic amendments
- Kelp meal (seaweed-based)
- Wood ash (use sparingly—¼ inch layer max)
- Greensand (slow-release potassium)
- Add phosphorus for root development
- Bone meal (slow-release phosphorus)
- Rock phosphate
- These support root storage and sweetness
Target Soil Nutrient Profile
Aim for an NPK ratio that favors potassium (K) and phosphorus (P) over nitrogen (N).
Ideal ratios for carrots:
- 1-2-2 (N-P-K)
- 1-1-2 (N-P-K)
Why this works:
- Potassium drives sugar storage in the inner part of the root (cortex), which is what makes carrots sweet
- Nitrogen drives leafy top growth, which is the opposite of what you want
- Phosphorus supports root development
Q6: Why Are the Tops of My Carrots Turning Green and Bitter?
Green shoulders have to do mainly with sunlight exposure. Earth up loose soil over exposed crowns to block light and preserve sweetness. This prevents bitter, green shoulders.
The Problem
As carrots bulk up, the root shoulders push above the soil line and expose themselves to direct sunlight.
The exposed tissue synthesizes chlorophyll (turning green) and produces solanine, a bitter compound related to the one found in green potato skins.
Result: Bitter, inedible carrots.
The Solution: Earthing Up
Earthing up (also called “hilling”) is simple and highly effective.
Step-by-Step:
- Check your crop weekly
- Once roots reach pencil thickness (about 3–4 weeks after thinning)
- Look for shoulders pushing above the soil line
- Mound loose soil or compost over exposed crowns
- When you see shoulders, cover them immediately
- Cover the top ½ to 1 inch of each root completely
- Use loose compost or mulch (not compacted soil)
- Benefits of earthing up
- Blocks sunlight, halts chlorophyll production
- Preserves sweetness and flavor
- Stabilizes the root and prevents drying
- Prevents crown cracking
- Mulch the bed surface
- Add 2–3 inches of straw or shredded leaves over the entire bed
- Keeps soil temperature consistent
- Reduces moisture fluctuations
- Blocks light from reaching any exposed shoulders
Real-World Impact
Earthing up + mulching together can reduce harvest waste from bitter green shoulders by up to 90%.
Q7: How Much Water Do Carrots Need, and How Often?
Germination phase (0–21 days): Keep soil surface moist constantly. Bulking phase (day 21 to harvest): 1 inch per week, deep watering. Inconsistent watering causes split roots.
Phase 1: Germination (Days 0–21)
During germination, the soil surface must never dry out.
Watering strategy:
- Water lightly and frequently
- Keep the top ¼ inch of soil moist at all times
- Use a fine mist or watering can with a rose attachment
- Never use an overhead hose (washes micro-seeds out of rows)
Frequency:
- Check daily
- Water once or twice daily depending on temperature and humidity
- In hot weather, you may need to mist twice daily
Phase 2: Taproot Elongation and Bulking (Day 21 to Harvest)
Once seedlings emerge, switch to deep, less frequent watering.
Watering strategy:
- Water deeply and consistently
- Approximately 1 inch per week total
- Moisture should penetrate to the full depth of the root zone (10–12 inches)
- Deep, weekly soaking encourages roots to grow downward rather than spreading shallowly
How to measure 1 inch:
- Place a rain gauge or straight-sided container in the garden
- Water until it collects 1 inch
- This ensures consistent, measurable watering
Frequency:
- Once per week in normal conditions
- Twice per week in hot, dry weather
- Adjust based on rainfall (count rain toward your 1 inch total)
The Danger of Irregular Watering
Cycling between bone-dry soil and heavy soaking causes the root tissues to expand and contract rapidly.
Result:
- Vertical cracks and splits run the length of the carrot
- Once a root splits, it’s vulnerable to rot
- Rot leads to pest entry and disease
- Split carrots are unusable
Expert Tip: Install Drip Irrigation
Eliminate human error with automation.
Benefits:
- Delivers consistent moisture daily
- No guesswork about watering depth
- Works on a timer (water while you sleep)
- Reduces overall water use by 30–40%
- Prevents over-watering and under-watering
Setup:
- Drip line or soaker hose placed along carrot rows
- Bury 1–2 inches below the soil surface
- Connect to a timer set for early morning (5–7 AM)
- Water for 30–45 minutes to deliver 1 inch per week
Q8: What Variety of Carrot Should I Choose for My Soil Type?
Matching cultivar to soil type is the #1 decision in carrot growing. Chantenay for clay, Nantes for loam, Danvers for most soils, Imperator for deep sand.
Why Variety Matters
Long varieties in heavy clay produce stunted, forked roots every time.
Short varieties in deep sand produce tiny, underdeveloped roots.
Matching your variety to your soil type is non-negotiable.
Carrot Variety Comparison
| Carrot Type | Best For | Root Length | Container? | Clay Tolerance | Flavor |
| Chantenay | Heavy clay, shallow beds | 5–6 in | ✅ Excellent | ⭐ High | Good, robust |
| Nantes | Loose loamy soil | 6–7 in | ✅ Very good | Moderate | ⭐ Excellent, crisp |
| Danvers | Semi-dense, most soils | 6–7 in | ✅ Good | ✅ Good | Good, reliable |
| Imperator | Deep, loose sandy loam | 8–10 in | ❌ Poor | Low | ⭐ Very good, sweet |
Recommended Varieties by Class
For Heavy Clay Soil (Chantenay Class):
- Red Cored Chantenay
- Hercules
- Thumbelina (shorter, even better for clay)
For Loamy Soil (Nantes Class):
- Scarlet Nantes
- Napoli
- Yaya
- Bolero
- Mokum
For Most Soils (Danvers Class):
- Danvers Half Long
- Danvers 126
For Deep, Loose Sand (Imperator Class):
- Imperator 58
- Tendersweet
For Containers & Shallow Soil:
- Paris Market (round, 3–4 cm diameter)
- Little Finger (baby carrot, 8 cm long)
- Thumbelina (5–6 cm, works in containers)
How to Choose
- Assess your soil type
- Heavy clay? → Chantenay
- Loose loam? → Nantes
- Mixed/unknown? → Danvers (most forgiving)
- Deep sand? → Imperator
- Consider your growing space
- Shallow raised bed (6–8 inches)? → Chantenay or Paris Market
- Standard raised bed (10–12 inches)? → Any variety
- Containers? → Paris Market or Little Finger
- In-ground with good soil? → Imperator or Nantes
- Pick for flavor
- Want ultra-sweet? → Nantes or Imperator
- Want reliable? → Danvers
- Want short and stocky? → Chantenay
Q9: When and How Do I Harvest Homegrown Carrots?
Harvest when root shoulders reach ½–¾ inch across (usually 55–80 days from sowing). Loosen soil first, then pull straight up gently. Never yank or twist.
When to Harvest
Most varieties reach maturity in 55 to 80 days from sowing.
The key indicator is shoulder diameter—measure the width of the root at the soil line.
Harvest when shoulders reach:
- ½ to ¾ inch across for standard varieties
- ¼ to ½ inch for baby carrot varieties
How to Harvest Without Snapping
Snapping the taproot tip means losing the sweetest, most tender part of the carrot.
Step-by-Step Harvest:
- Water the bed lightly the day before
- Softens the soil and makes pulling easier
- Reduces root breakage
- Loosen the soil around each carrot
- Use a hand trowel, broadfork, or garden fork
- Insert the tool 4–5 inches away from the root (avoid piercing it)
- Gently rock the tool back and forth to break the soil bond
- Grip the carrot firmly
- Grip at the base of the foliage (where greens meet root)
- Use a firm, confident grip
- Pull straight up in a smooth, steady motion
- No yanking or twisting
- One smooth pull
- The taproot tip will snap off if you jerk or twist
- Remove excess soil
- Brush off soil gently with your hands
- Don’t wash yet (reduces storage life)
Quality Verification After Harvest
Assess each root for:
- Straightness: No bends or forks
- Skin smoothness: No cracks or scabs
- Core tenderness: Slice through the center—the core should be barely distinguishable from the outer flesh
- Sweetness: Use a refractometer (optional) for Brix sugar level. 8–12° Brix indicates excellent sweetness for a fresh carrot
Q10: How Do I Make My Carrots Taste Sweeter?
Cold temperatures trigger starch-to-sugar conversion. Sow a late-season crop 10–12 weeks before first frost. Leave in the ground through light frost. Harvest after a cold snap for 20–40% more sugar.
The Science: Cold-Induced Sweetening
When soil temperatures drop in autumn, carrots convert stored starches into soluble sugars.
This is a biological antifreeze mechanism—the plant is protecting itself from freezing.
Result: Dramatically increased sweetness.
The Sugar Bank
Think of your carrot root as a sugar bank.
Cool soil temperatures signal the plant to convert starch reserves into soluble sugars, creating built-in antifreeze protection.
The colder the soil (down to just above freezing), the sweeter the withdrawal.
The Fall Harvest Strategy
Step 1: Sow a late-season crop
- Sow 10–12 weeks before your first expected frost date
- Use a variety suited to your climate (Nantes or Danvers work well)
- Example: If your first frost is October 15, sow around July 1–15
Step 2: Leave the crop in the ground through light frost
- Don’t harvest immediately when ready
- Wait for one or two light autumn frosts (not hard freezes)
- Light frost = 28–32°F
- Hard freeze = below 25°F (too cold, roots may die)
Step 3: Harvest after the cold snap
- Pull carrots after the cold snap but before sustained freezing temperatures
- Roots left in ground through light frost increase sugar content by 20–40% compared to summer-harvested carrots
Step 4: Store for continued sweetening
- Harvest carrots and store at 32–40°F
- Use slightly damp sand or perforated plastic bags
- Store for 2–4 weeks
- Cold storage continues starch-to-sugar conversion even after roots are out of ground
Timing by Region
| Region | First Frost Date | Sow Date | Harvest Date |
| Northern US | September 15 | June 15 | October 15–November 1 |
| Mid-Atlantic | October 15 | July 15 | November 1–15 |
| Southern US | November 15 | August 15 | December 1–15 |
| Pacific Northwest | October 1 | July 1 | October 30–November 15 |
Post-Harvest Sweetening Bonus
Even if you harvest in summer, you can boost sweetness through cold storage.
Process:
- Harvest carrots when ready
- Store at 32–40°F in slightly damp sand or perforated plastic bags
- Leave for 2–4 weeks
- Starch-to-sugar conversion continues in cold storage
- Carrots become noticeably sweeter
Conclusion: Your Weekend Onboarding Checklist
You’ve now got the full diagnostic toolkit — from germination hydraulics to sugar-bank biochemistry. Here’s your 5-step weekend action plan to get from hesitant seed sower to root crop expert:
- Build the bed: Sift soil to 12 inches deep. Mix 50% coarse sand with 50% sifted compost. Remove every stone and clod.
- Choose your cultivar: Match variety to your soil — Chantenay for clay, Nantes for loam, Imperator for deep sand, Paris Market for containers.
- Sow with the board hack: Plant seeds ¼ inch deep, water gently, cover the row with a plank or burlap, and check daily for emergence.
- Execute the two-stage thin: Snip (don’t pull) to 1 inch apart at 2 inches tall, then to 2–3 inches apart at 8 inches tall. Eat the baby carrot thinnings.
- Time the harvest for sweetness: Leave fall crops through one or two light frosts to trigger starch-to-sugar conversion. Pull straight up after loosening the soil.
The difference between a bitter, forked, hairy root and a crisp, straight, candy-sweet carrot comes down to soil friability, moisture consistency, and nutrient balance. Get those three variables right, and your homegrown carrots will surpass anything on a supermarket shelf — in flavor, in crunch, and in the quiet satisfaction of pulling perfection from the earth.
Amazon and the Amazon logo are trademarks of Amazon.com, Inc, or its affiliates.