We use affiliate links to run our site. When you buy through links on our site, we may earn an affiliate commission, without any added cost to you. Learn more
Gardening can feel like very hard work. You dig out weeds, till heavy soil, and amend the earth before planting a seed. Sheet composting changes that by doing it smartly. It helps you build rich, fertile soil right on the ground. It suppresses weeds and adds nutrients without heavy lifting.
Often called “lasagna gardening,” sheet composting is perfect for urban gardeners with limited space. It also helps anyone turn a bare patch of ground into a thriving garden bed with less effort. Sheet composting is different from traditional composting. You don’t need a bin or months of turning. Instead, it happens right where you want to plant.
What Is Sheet Composting:
Sheet composting is a no-dig method where you layer organic materials directly onto the soil surface. Instead of piling ingredients in a heap, you spread them out in a flat “sheet.”
As these layers decompose, they:
- Suppress weeds by blocking sunlight.
- Amend the soil by feeding earthworms and microbes.
- Add nutrients slowly and steadily as the material breaks down.
The best part? You can often start planting into the edges of the bed while the decomposition continues underneath.
Why Use Sheet Composting Methods:
This method solves several common gardening headaches:
- No Digging Required: Ideal for compacted soil or areas with hidden rocks.
- Space Efficient: Perfect for small urban yards, patios, or raised beds.
- Weed Control: Thick layers of cardboard or newspaper smother existing grass and weeds.
- Moisture Retention: The organic layers hold water better than bare soil, reducing irrigation needs.
The Ingredients: Greens vs. Browns
To create successful sheet compost, you need a balanced mix of Nitrogen (Greens) and Carbon (Browns). Using the wrong ratio can lead to a smelly, slimy mess or a decomposition process that never finishes.
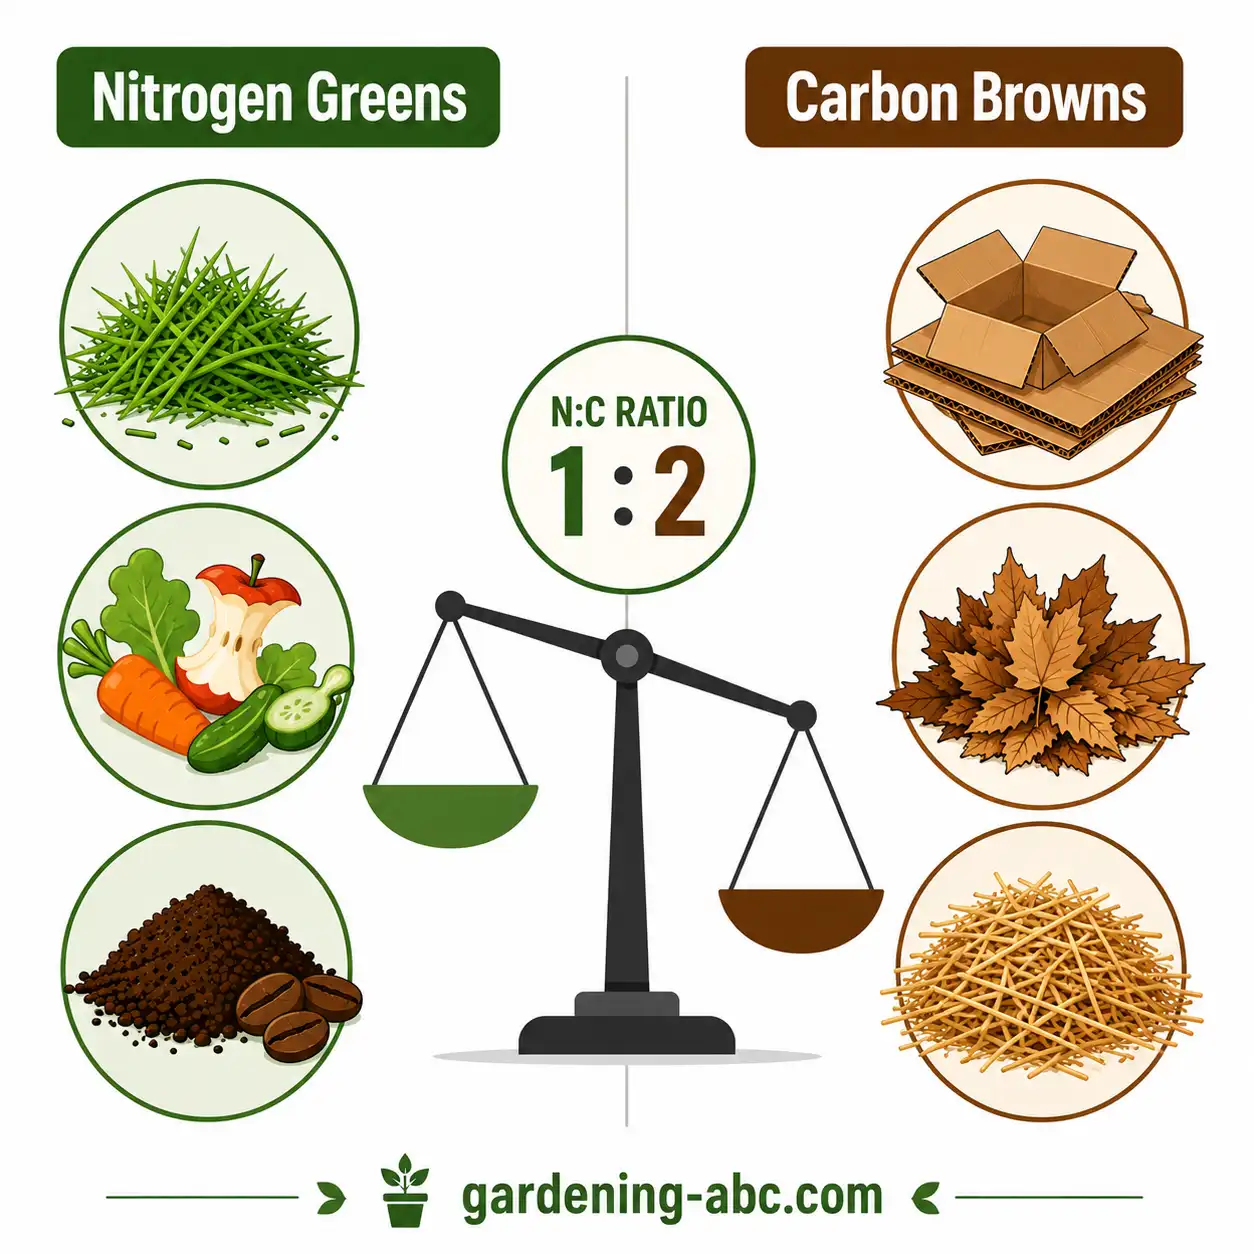
Common Nitrogen Sources (Greens)
- Used coffee grounds
- Composted manures (chicken, cow, horse)
- Alfalfa pellets
- Vegetable/fruit scraps
- Fresh grass clippings
- Cottonseed meal
- Soybean meal/blood meal
Common Carbon Sources (Browns)
- Sawdust (untreated wood only)
- Dried Leaves
- Cornstalks
- Cardboard (uncoated, tape removed)
- Peat moss
- Shredded newspaper (black and white print only)
- Straw/hay
- Wood chips
Pro Tip: Aim for a ratio of roughly 2 parts Brown to 1 part Green by volume. If your pile smells bad, add more Brown. If it’s not breaking down, add more Green and water. Check out this article for more information
How to Prepare Sheet Compost:
Follow this proven method to build your bed.
Step 1: Prepare the Base
You do not need to till the soil. However, if the area hasn’t been worked in years, you may want to loosen the top inch or two with a spade to help worms enter. Do not remove existing weeds or grass; the layers above will kill them.
- Action: Mow existing grass very short or water the area to soften the soil.
Step 2: The Carbon Barrier
Lay down a thick layer of carbon material directly on the soil. This acts as the weed barrier.
- Material: Wet cardboard or 4–6 sheets of overlapping newspaper.
- Why: This blocks light, killing the grass underneath while allowing water and worms to pass through.
Step 3: Moisten the Base
Water the cardboard or newspaper thoroughly. The layers must be wet like a wrung-out sponge. Dry materials will not decompose effectively.
Step 4: Add the Nitrogen Layer
Spread a 2–4 inch layer of “Greens” over the wet cardboard.
- Material: Grass clippings, vegetable scraps, or manure.
- Tip: Break up large scraps to speed up decomposition.
Step 5: Add the Carbon Layer
Cover the greens with a 4–6 inch layer of “Browns.”
- Material: Compost, dry leaves, straw, or shredded paper.
- Tip: This layer prevents odors and keeps pests away.
Step 6: Repeat and Water
Continue alternating layers (Greens, then Browns) until the pile is 18–24 inches high.
- Crucial Step: Moisten every single layer as you build. Dry layers stop the microbial activity.
Step 7: The Final Cover
Once your bed is built, cover the top with a thin layer of finished compost or mulch. You can cover the whole bed with breathable landscape fabric or a plastic sheet for a few weeks. This helps speed up the breakdown, but it’s not required.
When Can you Plant:
Sheet composting is a slower process than using finished compost in a pile because less heat is generated.
Planting in a Rush: If you need to plant immediately, dig a hole through the layers down into the native soil. Plant your seedling there and backfill with the decomposing material. Do not plant directly into the fresh, undecomposed layers, as the heat and nitrogen imbalance can damage young roots.
The 6-Month Rule: Ideally, start your sheet compost in the fall so it is ready for planting in spring. This gives the layers 6+ months to decompose into a crumbly, earth-smelling soil.
Sheet Composting Vs Mulching:
It is easy to confuse these two, but they serve different primary purposes:
| Feature | Sheet Composting | Mulching |
| Primary Goal | To build and amend soil quality. | To retain moisture and suppress weeds. |
| Decomposition | Materials are meant to break down into soil. | Materials sit on top; some break down slowly. |
| Depth | Thick layers (18+ inches) that become soil. | Thin layers (2–4 inches) left on surface. |
| Timing | Requires months to decompose before planting. | Can be applied anytime, even around existing plants. |
Common Mistakes to Avoid
- Skipping the Water: Dry layers = rotting. If it’s not wet, microbes can’t work.
- Using Glossy Paper: Magazines and glossy boxes often contain plastics and heavy metals. Stick to matte newspaper and plain cardboard.
- Adding Weeds with Seeds: If you add weeds that have gone to seed, you will just be planting a new garden of weeds next year.
- Planting Too Soon: Patience is key. If you plant too soon, your plants will struggle to find roots in the chunky, undecomposed mix.
Conclusion:
Sheet composting is the best way to grow your garden with little effort. You just need a spade and a balanced mix of greens and browns. Start in the fall, and let nature work. By spring, you’ll have a rich, nutrient-filled bed ready for planting.
Enjoyed the article? Please consider sharing it:
Frequently Asked Questions (FAQ)
Can I use diseased plants or weeds with seeds in sheet composting?
No. Unlike trading composting, sheet composting releases very little heat. This heat is not enough to kills pathogens and seeds. Using diseased plants risks spreading the disease to your new garden bed. Weeds with seeds, like dandelions or crabgrass, can survive decomposition. They often sprout later. Only use healthy plant matter or weeds that have not yet gone to seed.
How often should I water the layers?
Moisture is the engine of decomposition. You should water the bed after every few layers are added and then once a week if there is no rain. The goal is to keep the pile as damp as a wrung-out sponge. If it feels dry and crumbly, microbes cannot work. If it is soggy and slimy, you need to add more carbon (dry leaves/cardboard) to absorb excess moisture.
Can I start sheet composting in the winter?
Yes, but with caveats. You can lay down the base layers (cardboard and greens) in winter, but decomposition will slow to a near halt due to freezing temperatures. The process will “pause” until the soil warms up in spring.
To speed things up, you can cover the bed with a layer of black plastic or a thick mulch (like straw) to trap heat from the sun. Plan to plant in spring or early summer.
What if I don’t have enough “Brown” materials (carbon)?
Carbon is the most critical ingredient for preventing odors and structure. If you are short on dry leaves or straw, you can use:
Shredded office paper (non-glossy, black and white only).
Untreated sawdust from woodworking projects.
Cardboard boxes (remove tape and labels).
Straw bales (often available cheaply at farm supply stores). Avoid using glossy magazines or colored paper, as these may contain heavy metals.
How do I know when the sheet compost is ready to plant?
You will know it is ready when:
Texture: The original materials, like cardboard and grass clumps, are now unrecognizable. They have changed into dark, crumbly soil.
Smell: It smells like fresh forest earth, not like rotting garbage or ammonia.
Depth: The pile has settled significantly (often by 50% of its original height) and integrated with the soil below. If you are unsure, wait another month. It is better to wait than to plant into a bed that is still actively decomposing.
Amazon and the Amazon logo are trademarks of Amazon.com, Inc, or its affiliates.
Hi Prasenjit,
That’s a good idea to write about mixing the composting material with the soil.
I live on a 1/2 acre suburban lot with a large compost pile. After composting, I mix in a variety of chemicals and then create a new soil to replace the debris that the contractor used to create my yard. It’s a slow process. After 20 years the method seems to have worked out well.
You might want to read my discussion of this soil problem and its solution at my blog posting in Sept. 2017
https://thegardenedge.blogspot.com/2017/09/
Thanks for the fine posting!