We use affiliate links to run our site. When you buy through links on our site, we may earn an affiliate commission, without any added cost to you. Learn more
If you are thinking about growing okra, this might just be the right time. Not only is okra a delicious addition to any meal but it’s also packed with health benefits and can be grown in a variety of climates.
Okra as a vegetable is very nutritious. It has a very mild flavor. But, the first thing you will notice about okra is its slimy texture. This is probably one of the main reasons why okras are not so popular among people.
If you are one of such persons, we have some good news for you. If you want you can grow okra solely as an ornamental plant. They have very beautiful hibiscus-like flowers.
But how do you grow okra at home?
In this post, we’ll share some useful tips and tricks to help you get started with growing okra in your own backyard. From choosing the right location to harvesting your first batch of okra pods, we’ve got you covered.
So let’s dig in and learn how to grow okra like a pro!
Okra Varieties:

Okra is also known as ladies’ finger and Bhindi (in India). The edible part of the plant is the pointed seed pods. Here are some of the most popular okra varieties, these are the different types of okra you can try in your own garden.
- Red Burgundy
- Silver Queen Okra
- Star of David
- Cow Horn
- Hill Country Heirloom Red etc.
Planting Okra:
When to Plant Okra?
Okra is a warm-weather crop. A full sunny spot is ideal for the plant. If you are from the cooler region don’t plant okra till the weather warms up. Cold weather can actually kill your plant.
The ideal temperature for growing okra is between 220C-320C, and it should never go below 120C.
They thrive in different soil conditions, but it is best to plant okra in well-drained soil, especially one that is rich in organic materials.
How To Grow Okra From Seeds?

While growing okra from the seeds, the first thing you will notice is that the seeds are much bigger than some of the other vegetables and so, it is quite easy to handle.
Before planting, soak okra seeds in warm water. You can either sow them directly in the garden soil or you can choose to first grow the seedlings indoors, and then transplant them into the garden.
If you are considering the second option, use some seedling trays available at the market and use coir or peat moss as the growing medium. Mix a generous amount of compost along with the soil before planting.
Okras can resist drought and heat very well. But inch-deep water weekly is ideal for the best pod production. Use organic mulch to protect the water in the soil.
Okra plants generally get large and they also spread their branches. So you need to do some thinning once the plants reach a height of 6”.
It is recommended to leave at least an 18 to 24 inches gap between two okra plants. In case the plants don’t get enough space to grow, the production of the pods will greatly suffer.
If you have used compost you don’t need to add any more fertilizer. Okra plants grow very quickly, especially once the pods start coming.
The pods can grow within 3 to 4 days. It appears first on the basis of the plant and goes upwards. A standardly sized plant can grow up to 6 to 8 feet.
Pest and Diseases of Okra Plants:
Some of the most troublesome pests of an okra plant are
- Silverleaf,
- Whitefly,
- Looper caterpillars,
- Aphids,
- Mites, and,
- Green vegetable bugs.
One of the most effective ways to protect your plant is to monitor closely. You can also try these 11 companion plants to enhance pest protection.
The most common forms of diseases associated with okra plants are:
- Yellowing of older leaves and wilting,
- Powdery mildew, and,
- Spots around leaves due to fungal attacks.
Okra plants are also prone to root-knot diseases caused by nematodes. To prevent this use crop rotation techniques.
Harvesting Okra:
Careful harvesting is a key to success in growing okra. Okra plants have spines. It is not wise to harvest pods barehand.
They can be scratchy and irritating. It is always a good idea to use gloves while harvesting the pods.
When to Harvest Okra:

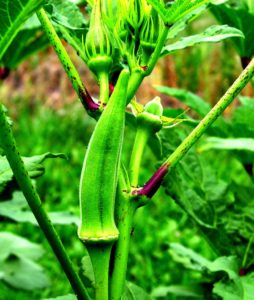
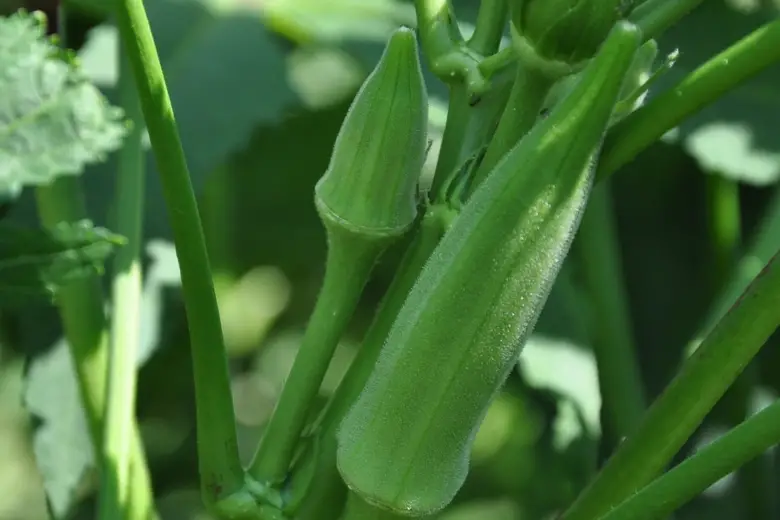
The best time to harvest is when the pods are 2-4 inches in length. Depending on the varieties, it generally takes 10 weeks for the pods to reach that size. At this time they the tender and tasty.
Though sometimes larger-sized pods are also tender and can be used as food. The best way to check its tenderness is by snapping off the end tip of the pod. It will not snap in case the pods have become fibrous.
Pick the fruits into a waist bag. It will reduce the damage.
Keep picking the pods every 2-3 days and there will be a new one in its place. Regular picking is almost essential for maximum okra yields. If you left mature pods on the plant, it will reduce flowering and fruit set.
Like many other vegetables, okra is also best when eaten fresh. You can also store them in a refrigerator for a week. Check out vegetable storing tips in this article.
Final thought:
We hope this guide on how to grow okra at home has been helpful to you. With a little bit of patience, care, and attention, you can enjoy a bountiful harvest of fresh, delicious okra right from your own backyard.
If you found this post useful, be sure to share it with your friends and family who might be interested in growing their own vegetables too. And don’t forget to check out our other articles on gardening and sustainable living for more tips and ideas!
Remember, taking action is the key to success. So why not start planning your okra garden today? Whether you’re a seasoned gardener or a newbie, growing your own food can be a rewarding and satisfying experience.
Give it a try – you might just surprise yourself with how easy and enjoyable it can be! Happy gardening!
Amazon and the Amazon logo are trademarks of Amazon.com, Inc, or its affiliates.

I got this web page from my pal who shared with me about
this web site and at the moment this time I am browsing this web
site and reading very informative articles at
this time.